2. Installation and basic configuration
The Hypervisor has to be installed onto an empty installation media. It is directly booted from the BIOS. Side-by-side installation with an existing Windows or Linux is not recommended, but possible. If an existing Windows or Linux system shall be kept, assure a free partition for booting the Hypervisor is available. The minimum required size for the installation media is 10 GByte.
2.1. USB stick boot media creation
You may use the free Rufus tool to create the boot media.
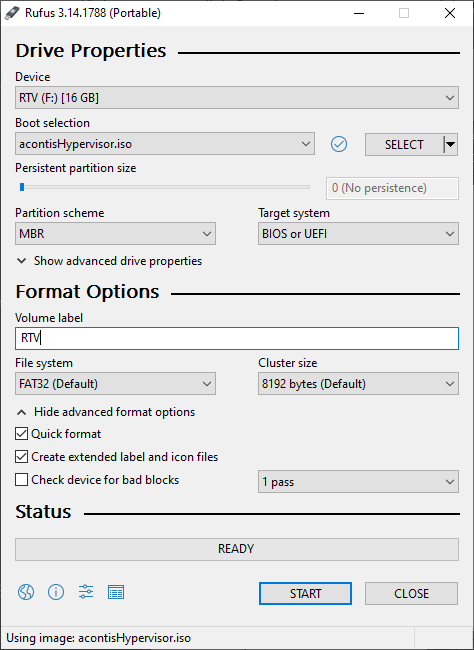
Fig. 2.1 Settings to create the acontis Hypervisor BOOT stick.
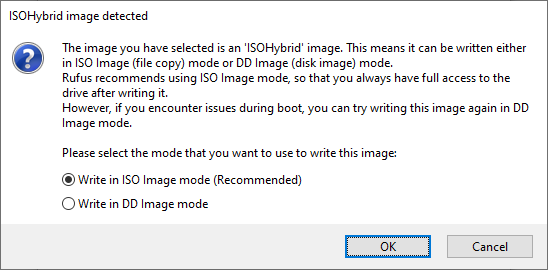
As the ISO is a hybrid ISO, Rufus will ask for the mode. Use the default ISO Image mode.
2.2. Installation
Currently, a light-weight Ubuntu derivate (Xubuntu) is used as the Hypervisor service operating system.
Select
Install acontis RTOSVisorto install the Hypervisor, other options are not supported.Follow the installation instructions.
Do not keep any existing Windows or Linux installation, let the installer erase previously installed OSes.
A user account must be created while installing the Hypervisor.
Note
A password MUST be defined!
After the installation has finished, you have to reboot the system.
When the BIOS startup finished, a boot menu is shown and the default entry
Ubuntuis selected, keep this and do not boot theHypervisorentry. This entry will be activated automatically after the first-time configuration.After the first login, you may be asked to upgrade the Xubuntu version. Select
Don't Upgrade
2.3. Remote Access to the Hypervisor using Remote Desktop Connection
When working with Windows for software development, it is recommended to remotely connect to the Hypervisor using a Remote Desktop Connection (using the RDP protocol).
On Xubuntu, the xrdp application will provide such access. When using Remote Desktop you may simply copy paste commands from this manual into the Hypervisor shell.
First you need to determine the IP address of the Hypervisor. Open a shell (right click on desktop and select ‘Open Terminal here’ or press CRTL + ALT + T)
ifconfig
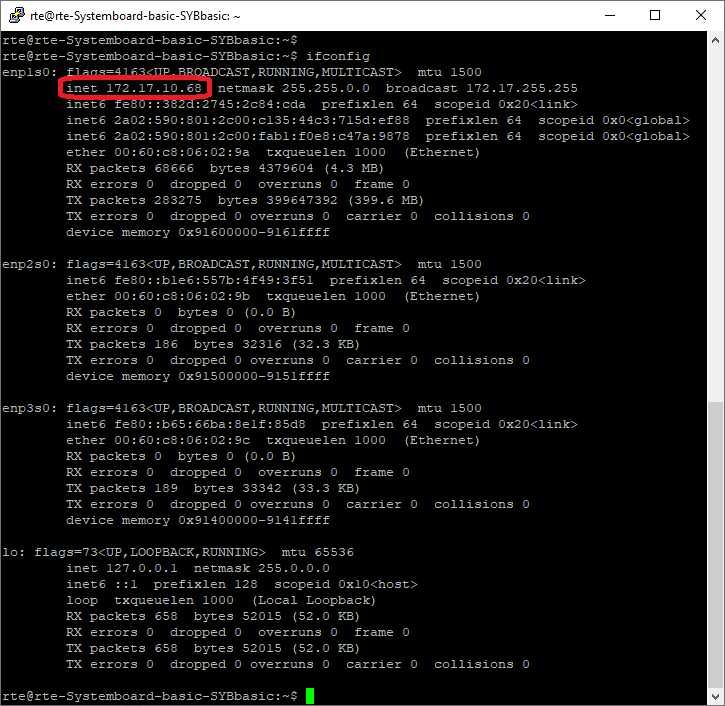
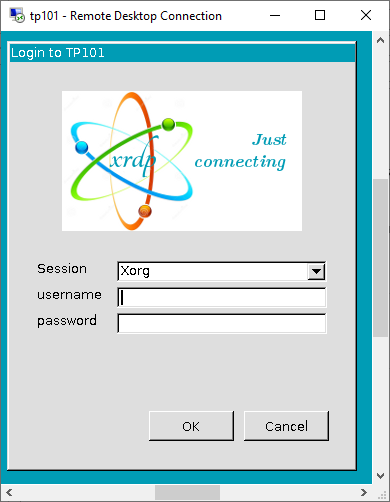
Now its possible to access the Hypervisor system through Windows Remote Desktop using the previously determined IP address.
Hint
Use the user account, which was created when installing the Hypervisor.
Caution
To log-in remote into the Hypervisor through xrdp, no other user must be logged-in into the Hypervisor. You must log off before connecting.
2.4. Basic system configuration
2.4.1. Power Management
To assure deterministic real-time behavior it is necessary to disable all power saving settings.
Several settings in the PC BIOS will have to be adjusted. You may take a look at the acontis website for example BIOS settings or pre-validated hardware BIOS settings
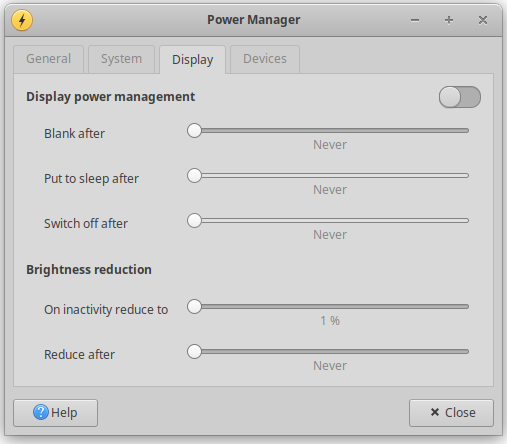
You need also to assure the Display Power Management is turned off in the hypervisor host.
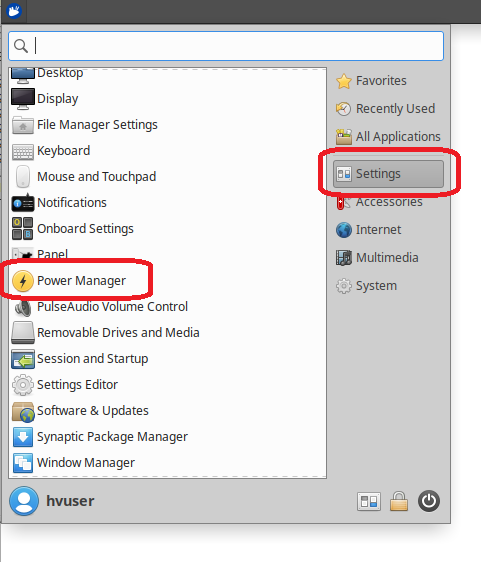
First, open the Power Manager
Then assure the Display Power Manager is turned off
2.4.2. hardware partitioning
Open a shell (right click on desktop and select ‘Open Terminal here’ or press CRTL + ALT + T)
Change to the configuration directory:
cd /hv/config
In the next step, the memory configuration for the real-time guest OS is set (this setting is rtos-dependent!). Use the inithv script:
Real-time Linux guest:
sudo ./inithv.sh 256 16On Time RTOS-32 guest:
sudo ./inithv.sh 64 16
The first parameter of the inithv.sh script will set the amount of memory to be assigned to the real-time guest OS, the second parameters will define the shared memory pool size in MB.
Caution
If you want to install a Windows or Ubuntu guest, the shared memory pool size must be at least 16 MByte and a power of 2 (16, 32, 64, 128, etc.)!
Caution
If you get the message WARNING: CPU frequency not stable... when running the inithv.sh script, you may not have properly disabled power settings in the BIOS. Please follow the respective instructions above (Prerequisites).
After! rebooting the Hypervisor, a second run of the inithv script may fix this issue.
Hint
adjmemconf.sh script.cd /hv/config sudo ./adjmemconf.sh 768 32 sudo reboot
Now, to get the changes effective, a reboot is required:
sudo reboot
2.5. Validate the configuration
The last step now is to validate if the system is correctly configured. For that purpose, a real-time demo application running in the real-time guest will be executed. The demo scripts to be used for this purpose will automatically start a console connection to show the output of the guest OS. When starting a Real-time Linux guest, you will have to log in first and start the demo manually. On RTOS-32 the demo is started automatically.
Real-time Linux:
cd /hv/lx
sudo ./lx.sh
./dbgcon.sh
Log in into Real-Time Linux and run the demo:
vmf64 login: root
password:  root
RealtimeDemo
On Time RTOS-32:
cd /hv/rtos-32
sudo ./realtimedemo.sh
To terminate the console connection to the real-time guest and stop showing the respective output messages: CTRL + C
Finally, stop the Real-time guest OS:
Real-time Linux:
cd /hv/lx
sudo ./stopall.sh
On Time RTOS-32:
cd /hv/rtos-32
sudo ./stopall.sh
Caution
Always stop the Real-time guest before starting again!