3. Validate Example Guests
The final step is to verify the correct configuration of the system. To achieve this, a demo application will be run on various sample real-time guests.
Caution
When the example guests are initialized, the corresponding pre-configured System Manager projects will be loaded. This process will delete any existing guests, subject to your confirmation.
You can preserve your current configuration by using the System Manager to save it before initializing an example.
Ensure you also save any manually added content in the /hv/guests/guestxxxx folders, as these will be deleted as well.
3.1. Preparation
The System Manager is a web-based graphical interface designed for managing RtosVisor projects.
Hint
Detailed documentation on the System Manager is available in the System Manager Manual.
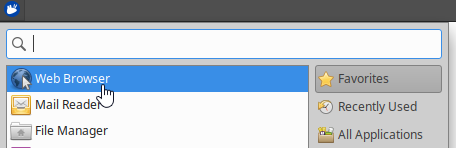
3.1.1. Browser Start
The Firefox browser can be launched directly on the Hypervisor Host. Click the top left icon and select Web Browser.
127.0.0.1 and connect to port 5000.http://127.0.0.1:5000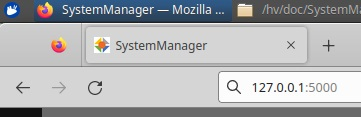
3.1.2. Local Connection
To connect the browser with the Hypervisor backend, please select Local Connection and the respective hypervisor type (RTOSVisor).
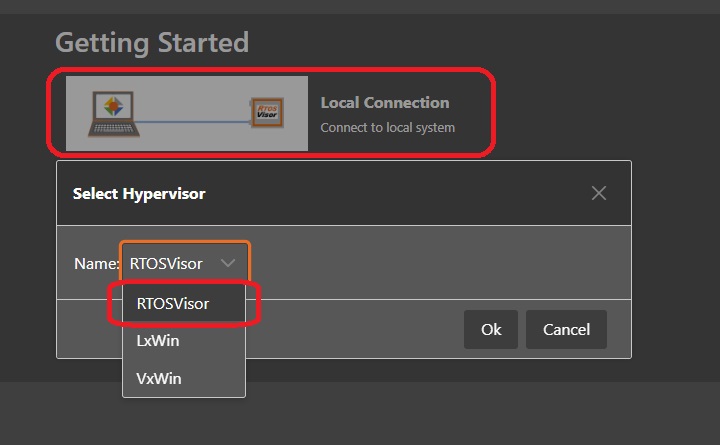
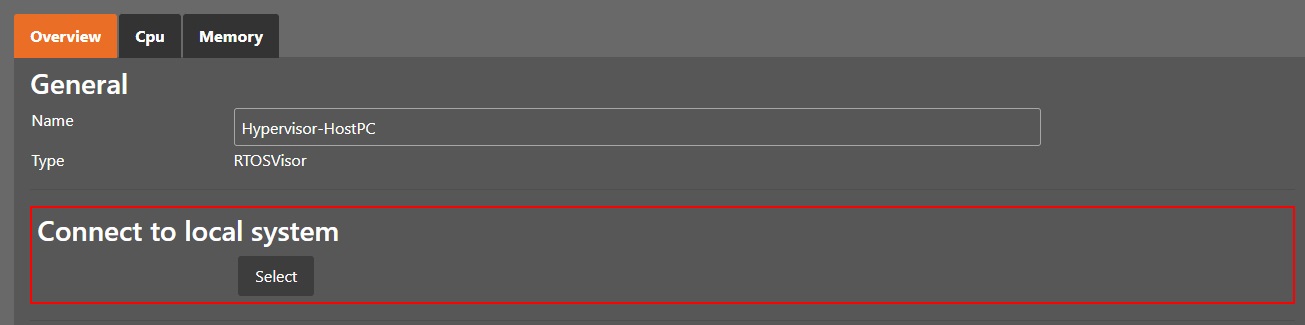
After acknowledging Connect to local system, the Hypervisor Host connection dialog will be shown.
You should provide an appropriate name for this Hypervisor Host and press the Select button.
3.1.3. Initial Synchronization
When you have started the System Manager for the first time, you need to run an initial synchronization step.
Click the synchronization button.
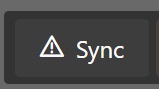
Fig. 3.1 A confirmation popup will then appear, where you need to press the Apply button.
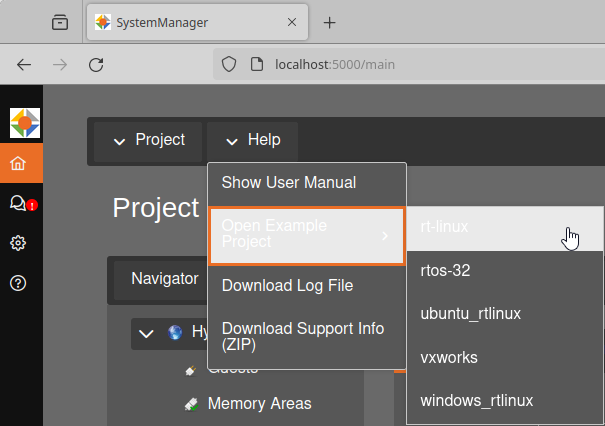
3.2. RT-Linux Guest Example
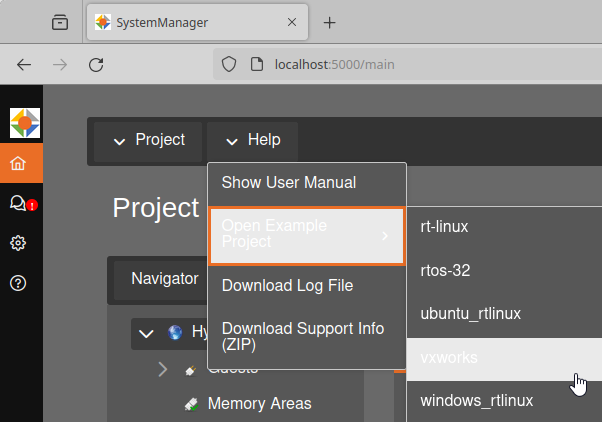
To open the Real-time Linux example with the System Manager, open the ‘Help’ menu, select ‘Open Example Project’ and select rt-linux.
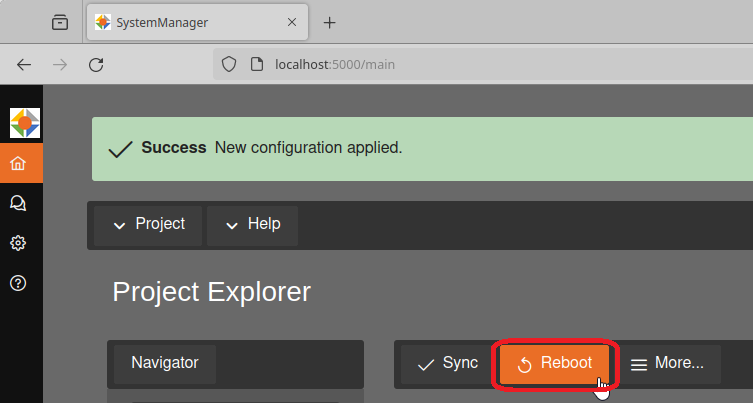
After Loading or changing a project you have to do the synchronization step again and click the Apply in the confirmation popup.
This action writes the configuration to the Hypervisor Host.
Once synchronization is successful, the Hypervisor Host has to be rebooted.
After rebooting the system, repeat the steps from the beginning.
Start the browser
Connect to
127.0.0.1:5000Select
Local Connection, then selectRTOSVisorin the popup windowClick the
Select-button in the sectionConnect to local system
With this the configuration is loaded and the real-time Linux guest can be launched.
Change to Run mode by pressing the button Run in the top right corner:

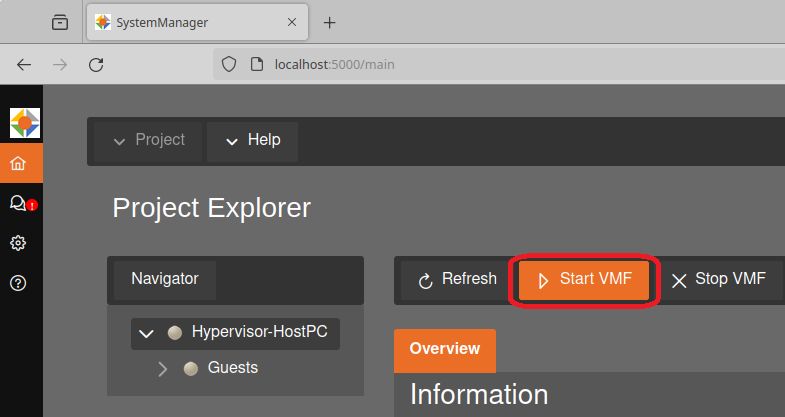
Start the Virtual Machine Framework (VMF). Starting the VMF will load the configuration for all guests. Real-time guests can only be launched when the VMF is running.
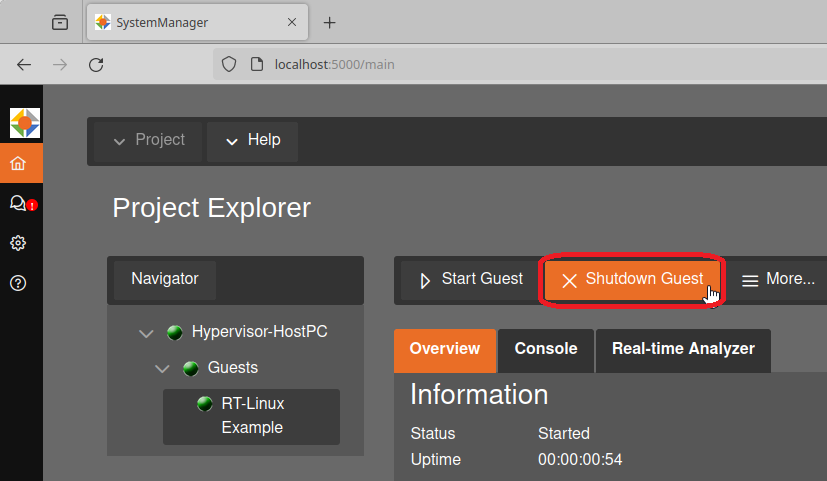
RT-Linux Example guest in the Navigator on the left side.Start Guest button.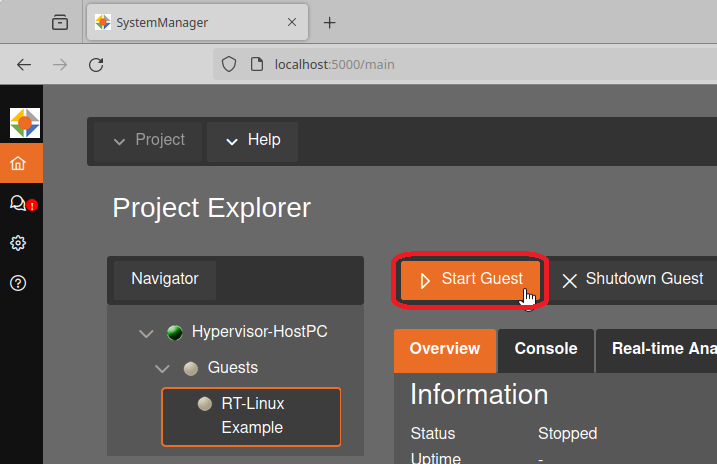
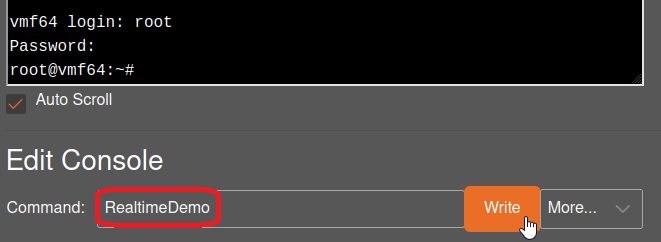
Console button to access the console view, displaying the output from the real-time Linux guest.Command field. Begin by logging in with the username root and the password root. To launch the RealtimeDemo application, enter the RealtimeDemo command.
This is detailed in the following steps: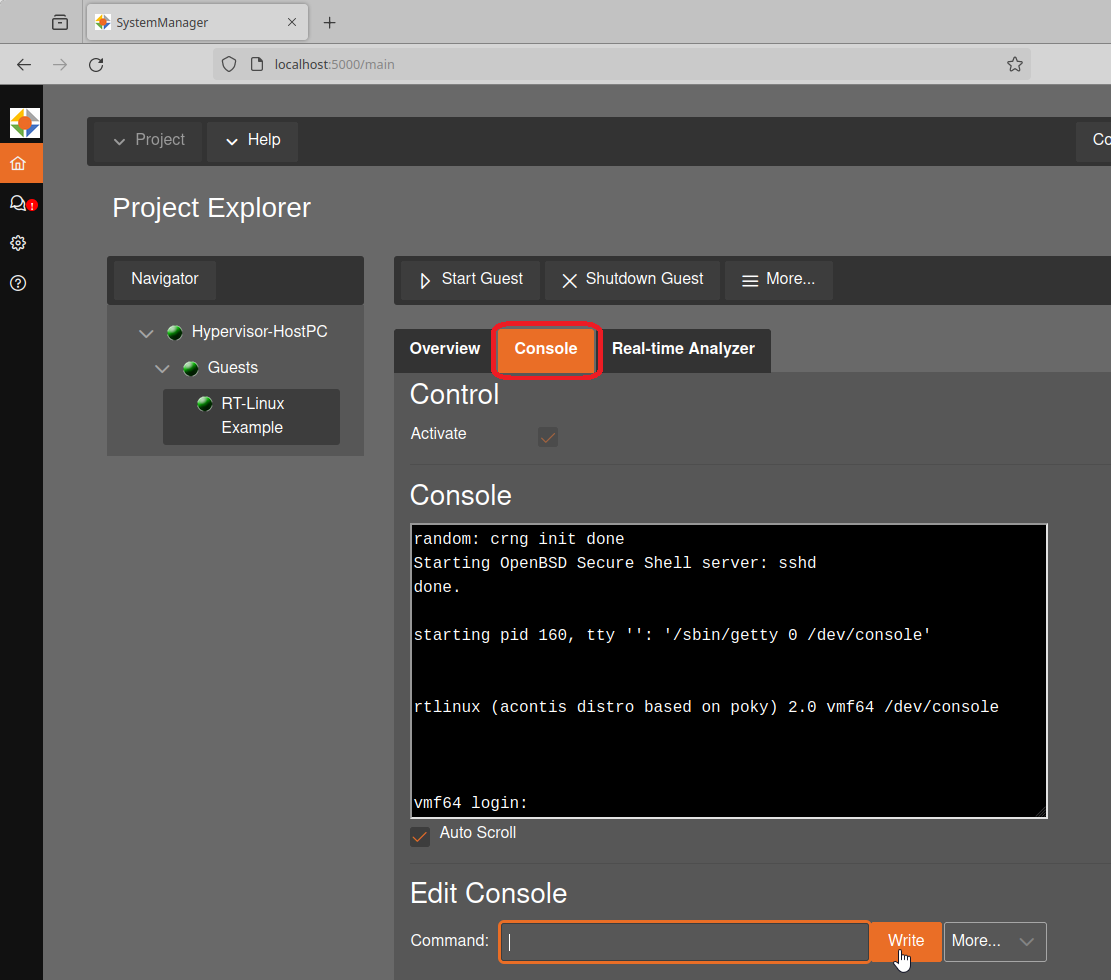
Enter root for vmf64 login.
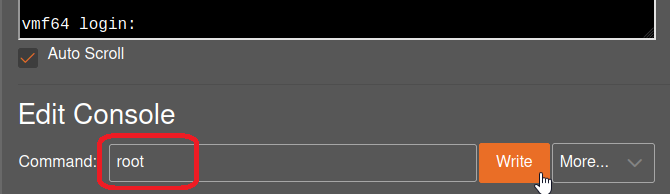
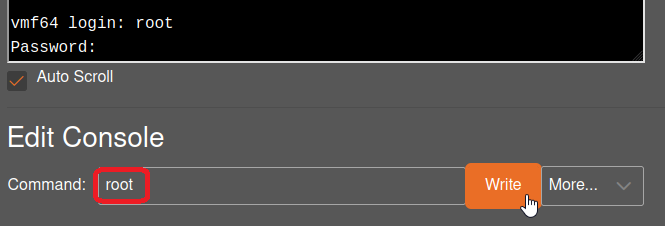
Enter root for the password.
Enter RealtimeDemo to start the real-time demo application.
To finish the RealtimeDemo application, you can stop the guest by clicking the Shutdown Guest button.
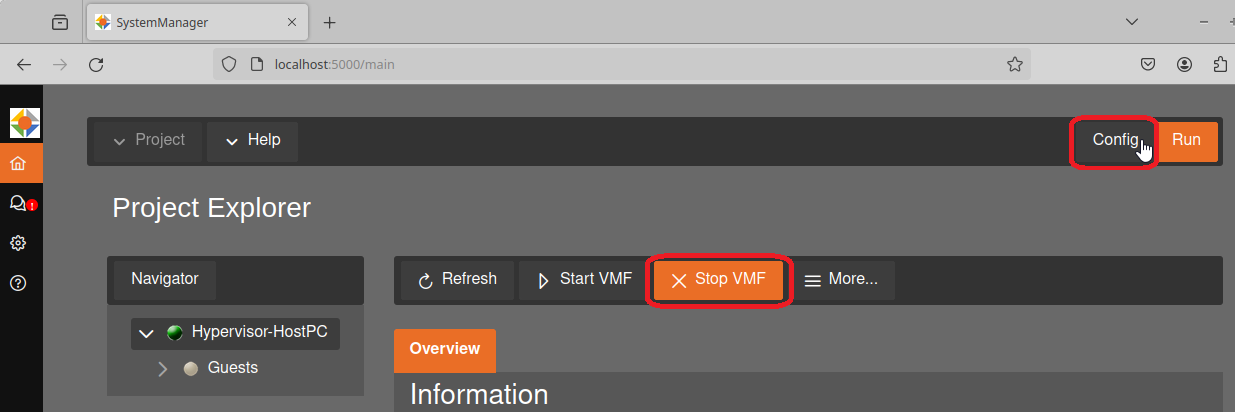
Once the guest is stopped, select the Hypervisor-HostPC on the Navigator tab, stop the VMF and switch back to Config mode by clicking the button in the top right corner.
3.3. VxWorks Guest Example
To open the VxWorks example, open the ‘Help’ menu, select ‘Open Example Project’ and select ‘vxworks’.
After loading or changing a project you have to press `Sync again and press Apply in the confirmation popup.
This action writes the configuration to the Hypervisor Host.
Once synchronization is successful, the Hypervisor Host has to be rebooted.
After rebooting the system, repeat the steps from the beginning.
Start the browser
Connect to
127.0.0.1:5000Select
Local Connectionand selectRTOSVisoras HypervisorClick on the
Selectbutton in theConnect to local systemsection
With this the configuration is loaded and the VxWorks guest can be launched.
Change to Run mode.
Start the Virtual Machine Framework (VMF). Starting the VMF will load the configuration for all guests. Real-time guests can only be launched when the VMF is running.
VxWorks Example guest in the Navigator on the left side.Start Guest button.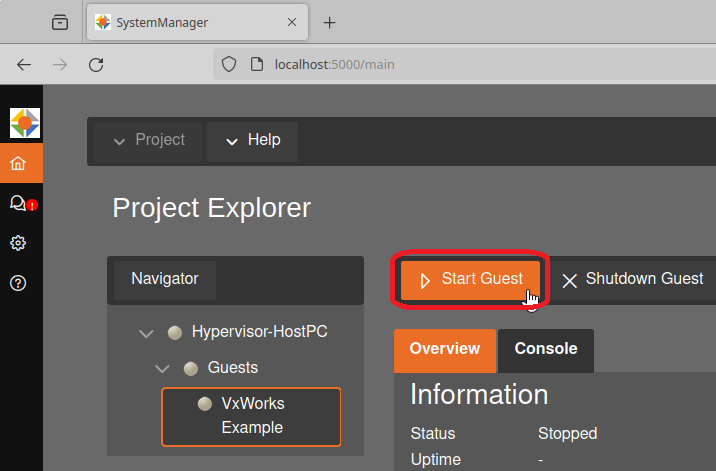
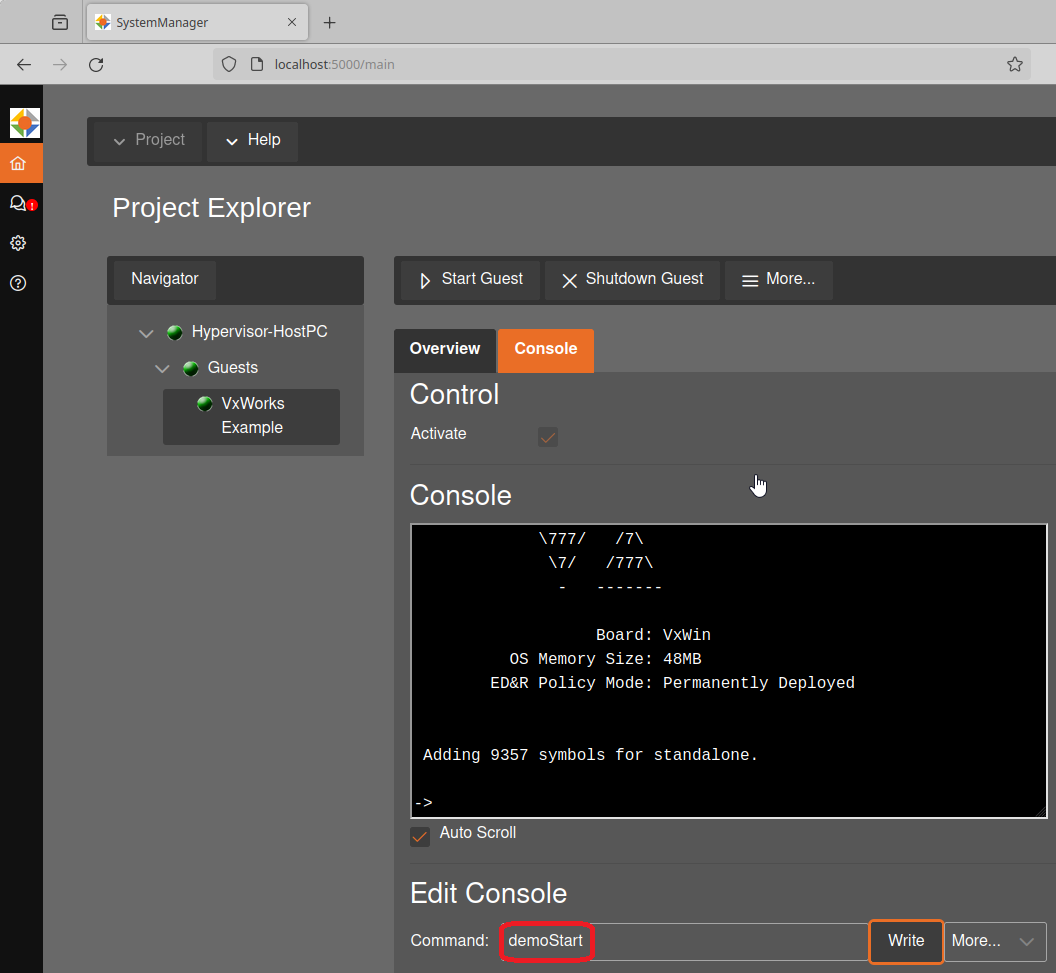
Console button to access the console view, displaying the output from the VxWorks guest.Command field. The RealtimeDemo can be started with the demoStart command.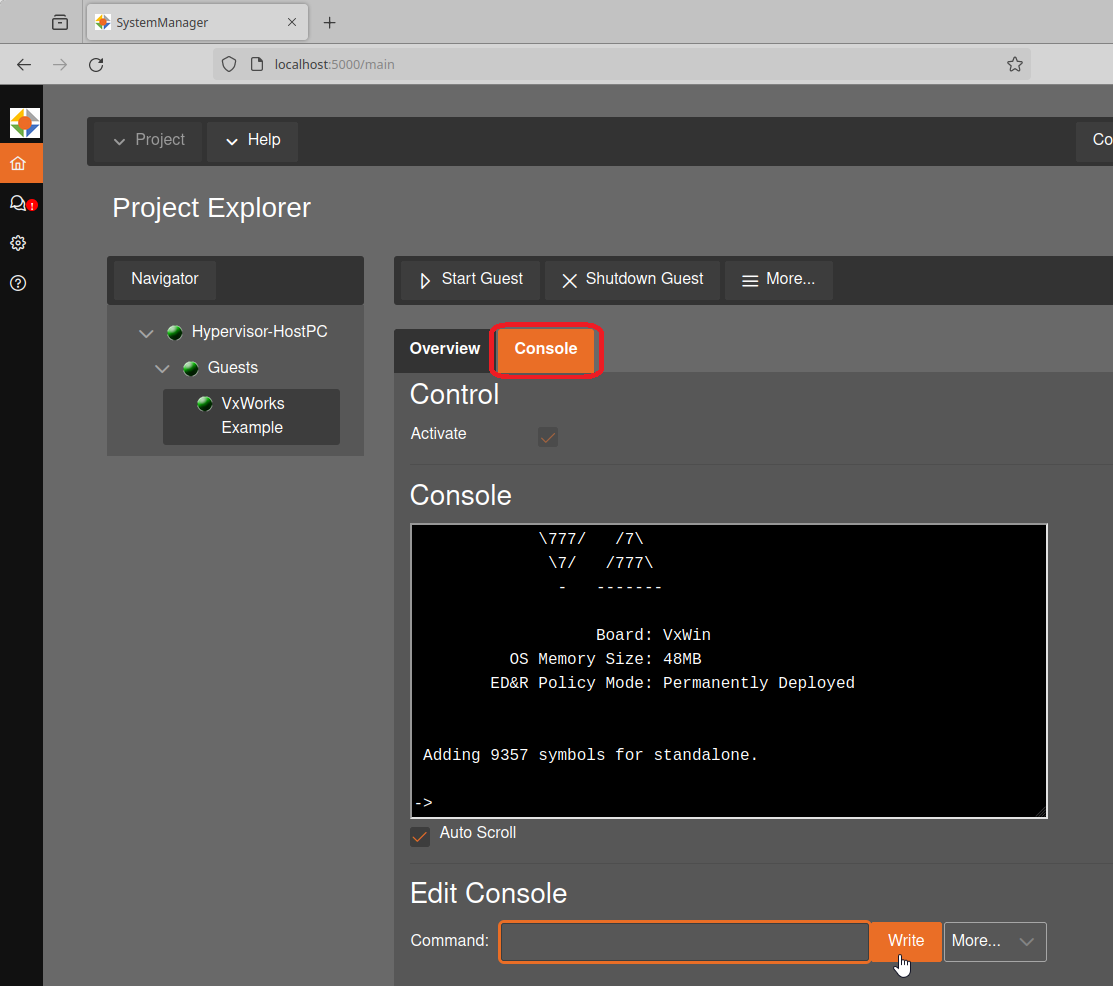
Enter demoStart to start the real-time demo application.
To finish the demo application, click on Shutdown Guest.
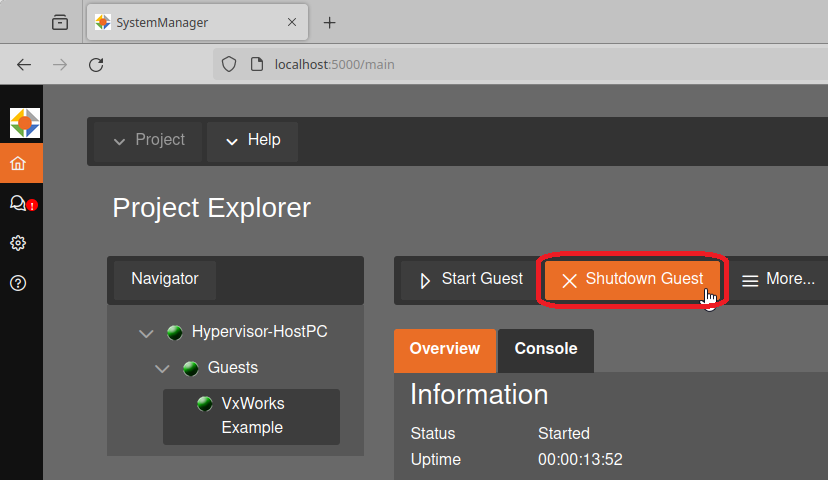
Once the guest is stopped, select the Hypervisor-HostPC on the Navigator tab, stop the VMF and switch back to Config mode.
3.4. Command Line operation
This chapter demonstrates how to use the example projects using the command line instead of the System Manager.
Real-time Linux:
When starting a Real-time Linux guest, you will have to log in first, open the example project and synchronize it.
Open a terminal and enter the following:
hv_open_example rt-linux hv_sync_example rt-linux
Reboot if the console messages ask you to.
cd /hv/guests/guestrtlinux
hv_guest_start -view
Log in into Real-Time Linux and run the demo:
vmf64 login: root
password:  root
RealtimeDemo
Terminate the
Debug Consoleconnection to the real-time guest and stop showing the respective output messages: CTRL + CAs an alternative to the
Debug Consoleon RT-Linux, you may also use asshconnection:ssh root@192.168.157.2The connection can be terminated by entering the
exitcommand:exitOn Time RTOS-32:
In RTOS-32 the demo is started automatically and the output is displayed in the console window. Adjust the guest configuration setting to prepare starting the RTOS-32Demo.
Initialize the RTOS-32 example
hv_open_example rtos-32
hv_sync_example rtos-32
Reboot if the console output asks you to.
cd /hv/guests/guestrtos32
mousepad usr.config
Add the following lines to modify the fileserver path directing to the guest directory.
[Host\FileServer]
    "HomeDir"="/hv/guests/guestrtos32"
Save your changes and switch back to the console. Update the link to the demo application:
rm -f rtos32app.dlm
ln -s /hv/templates/example_guests/rtos-32/files files
ln -s /hv/guests/guestrtos32/files/RTOS-32Demo.dlm rtos32app.dlm
Run the demo:
cd /hv/guests/guestrtos32
hv_guest_start -view
Terminate the
Debug Consoleconnection to the real-time guest and stop showing the respective output messages: CTRL + CTo run a different example the link to rtos32app.dlm must be changed. To run the real-time demo, adjust the link as follows:
cd /hv/guests/guestrtos32
hv_guest_stop
rm rtos32app.dlm
ln -s /hv/guests/guestrtos32/files/RealtimeDemo.dlm rtos32app.dlm
Run the demo:
cd /hv/guests/guestrtos32
hv_guest_start -view
Terminate the
Debug Consoleconnection to the real-time guest and stop showing the respective output messages: CTRL + CVxWorks:
Initialize the VxWorks example.
hv_open_example vxworks
hv_sync_example vxworks
Reboot if the console output asks you to.
cd /hv/guests/guestvxworks
hv_guest_start -view
Run the demo:
demoStartTerminate the
Debug Consoleconnection to the real-time guest and stop showing the respective output messages: CTRL + C
Finally, stop the Real-time guest OS:
Real-time Linux:
cd /hv/guests/guestrtlinux
hv_guest_stop
On Time RTOS-32:
cd /hv/guests/guestrtos32
hv_guest_stop
VxWorks:
cd /hv/guests/guestvxworks
hv_guest_stop
To restart a running guest, you can use the hv_guest_restart command, for example:
cd /hv/guests/guestrtlinux
hv_guest_restart