5. Yocto Real-time Linux
5.1. Introduction to the Yocto Project
The Yocto Project is an open-source framework that provides a robust environment for creating custom Linux distributions. Unlike general-purpose Linux distributions, Yocto is designed to build a Linux operating system tailored specifically to your hardware and use case, ensuring the system includes only the components you need.
With Yocto Linux, you can develop a custom-built operating system that is optimized for your hardware, whether it’s for embedded systems, IoT devices, or other specialized platforms. The Yocto Project offers a range of tools to configure and build the OS, allowing developers to strip away unnecessary software, thereby reducing the overall size and complexity of the distribution.
Key Benefits of Yocto
Customizability: Yocto provides granular control over the operating system’s composition. You can include only the essential components required for your project, minimizing bloat and reducing attack surfaces.
Smaller Footprint: By tailoring the OS to specific needs, Yocto Linux results in a highly efficient and lightweight distribution. This makes it particularly well-suited for resource-constrained environments such as embedded systems, where memory and storage are limited.
Flexibility: The Yocto Project offers full control over every aspect of the build process. This includes the selection of the Linux kernel, libraries, and user space applications. Developers can create and maintain their own board support packages (BSPs) and toolchains to ensure the OS is fine-tuned for the intended hardware platform.
5.2. How to create your own RT-Linux Image (BSP)
The Real-time Linux guest image is created using Yocto. The RT-Linux Guest SDK is shipped with several Yocto source packages:
sources_x86*.tar.xz- sources for 32-bit Linux versionsources_x64*.tar.xz- sources for 64-bit Linux version
Each packet contains sources and closed source binaries required to build the respective RT-Linux image.
5.2.1. Yocto Build System Installation
5.2.1.1. Linux
It is recommended to use Ubuntu 22.04 or newer to build the RT-Linux image.
Copy the sources_x*.tar.xz file that is related to the RT-Linux image you want to create
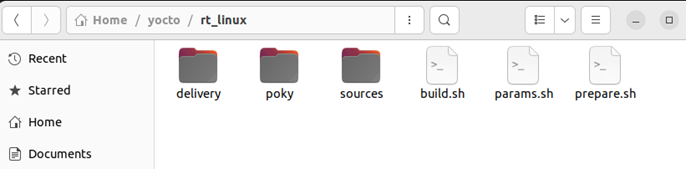
to your Linux machine and decompress it with the following command, e.g. into folder ~/yocto/rt_linux:
tar -xf sources_x*.tar.xz
After decompression the script prepare.sh is available.
Run the script to install all required packages.
sudo ./prepare.sh
5.2.1.2. Docker
You may run the yocto build in a Docker container. In a first step, a container with Yocto support must be generated.
Create the yoctobld.cfg file with the following docker configuration:
# Dockerfile for yocto build container

# Use a lightweight Ubuntu base image
FROM ubuntu:22.04

# Set environment to noninteractive to avoid prompts during build
ENV DEBIAN_FRONTEND=noninteractive

# Add i386 architecture for installing 32-bit packages
RUN dpkg --add-architecture i386

# Update package lists, install minimal dependencies, and remove apt caches
RUN apt-get update \
    && apt-get install -y --no-install-recommends \
       ca-certificates \
       curl \
       netbase \
       git-core diffstat unzip texinfo gcc-multilib build-essential socat \
           cpio python3 python3-pip python3-pexpect python3-git python3-jinja2 python3-venv \
           python3-dev python3-distutils xz-utils debianutils iputils-ping libsdl1.2-dev \
           xterm libssl-dev lz4 liblz4-tool make diffstat chrpath zstd \
           p7zip-full g++-multilib libelf-dev file gawk wget \
           zstd libfuse-dev:i386 \
           locales \
    && apt-get clean \
    && rm -rf /var/lib/apt/lists/* /tmp/* /var/tmp/*

# Set up en_US.UTF-8 locale
RUN apt-get update && apt-get install -y locales \
    && echo "en_US.UTF-8 UTF-8" > /etc/locale.gen \
    && locale-gen en_US.UTF-8

# Create user myuser with password MyUserPassword123!
RUN useradd -m myuser \
    && echo "myuser:MyUserPassword123!" | chpasswd \
    && usermod -aG sudo myuser

# Set environment variables for locale
ENV LANG=en_US.UTF-8 \
    LC_ALL=en_US.UTF-8

# default command
# Run a simple Python HTTP server
CMD ["/bin/bash"]
Then create the blddocker.sh script:
#!/bin/bash

# Name of the Docker image
IMAGE_NAME="yoctobld"

# Pull the latest Ubuntu image (optional)
echo "Pulling the latest Ubuntu base image..."
docker pull ubuntu:22.04

# Build the Docker image
echo "Building the yoctobld docker image..."
docker build --no-cache -f yoctobld.cfg -t $IMAGE_NAME .
Create the container:
chmod +x blddocker.sh
./blddocker.sh
Create the docker start script rundocker.sh:
#!/bin/bash
docker run -it --user myuser --rm \
    --workdir=/rt_linux \
    -v ~/docker/yoctobld:/rt_linux \
    -v ~/docker/yoctobld:/home/$(whoami)/docker/yoctobld \
    -v ~/docker/yoctobld/rte:/home/rte \
    yoctobld /bin/bash
Start the container:
chmod +x rundocker.sh
./rundocker.sh
5.2.1.3. Windows 10 (WSL2)
You can use the docker container from the previous chapter to set up the yocto build environment in Windows 10.
See Windows 10 (WSL2) on how to install Docker in Windows 10.
5.2.2. Build the RT-Linux Image
By default, all required packages are downloaded from the Internet.
If you want to speed up the build, you may copy the linux-stable-rt.git repository (to be requested from your software supplier) into the folder $bldroot\rte\p
where $bldroot is the root folder of the yocto build.
Run the build.sh script to build the image.
sudo ./build.sh
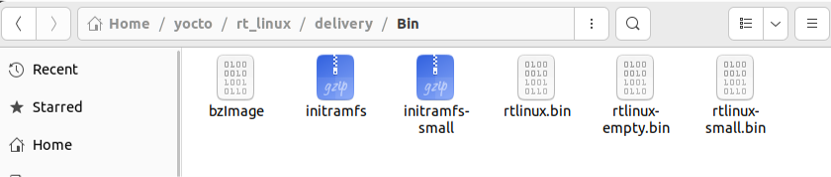
The resulting binary file will be stored in delivery/Bin/rtlinux.bin.
5.2.3. How to change the default RT-Linux Image
Yocto is used to build the images. Yocto is a flexible and well documented system. If the shipped default image does not satisfy your requirements, you can change it.
Here is the description of some files which are likely candidates for changes:
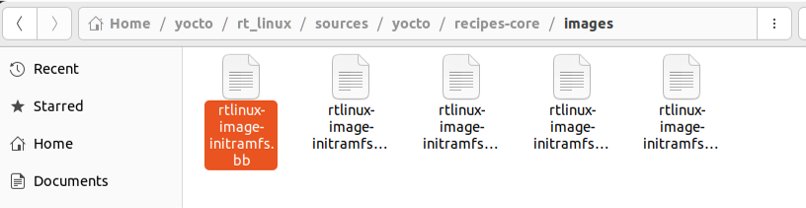
sources/yocto/recipes-core/images/rtlinux-image-initramfs.bb- BitBake file which describes all packages included to the default imagesources/yocto/recipes-core/images/rtlinux-image-initramfs-small.bb- BitBake file for a minimal image. Can be used for systems with low memory footprint or as an example that shows which packages could be removed.
Both of these Bitbake files change the PACKAGE_INSTALL variable. This variable shows which packages will be installed on the system.
sources/yocto/recipes-kernel/linux/linux-yocto-rt/defconfig
and sources/yocto/recipes-kernel/linux/linux-yocto-rt/x86-64/defconfig are Kernel configuration files for 32- and 64-bit versions.
Possible use cases when you may need to adjust the RT-Linux image:
Reduce the size of the image.
You can remove packages from the
PACKAGE_INSTALLvariable. For example, GDB server is not required in the production image.You can install only required kernel modules instead of all modules. Package
kernel-modulesinstalls all modules. Inside thertlinux-image-initramfs-small.bbfile you can see how to install specific modules.
Add specific closed source package.
Package
sources/yocto/recipes-core/initrdscriptscontains a list of files added to the image. You can see several binary files are located insideinitrdscripts/files/usr/bindirectory.
Change the Kernel configuration.
defconfig is the Kernel configuration file.
Change default user credentials:
By default, the user
rootwith the passwordrootis used. It is defined in thesources/yocto/conf/layer.conffile.
After you have made changes to the Yocto configuration files, run the build script.
./build.sh
The file rtlinux.bin will be the newly created RT-Linux binary image.
5.2.4. How to add an application to the default RT-Linux Image
In this example, we will show how to add the EC-Master version 3.1.4.11 demo application to the RT-Linux image.
Here, the yocto packages is located in ~/yocto/rt_linux.
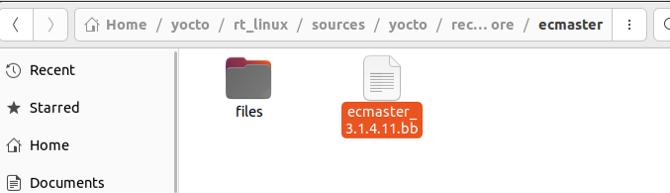
Create a new folder ~/yocto/rt_linux/sources/yocto/recipes-core/ecmaster/files and copy all EC-Master binaries to this folder.

Create a new Bitbake file ecmaster_3.1.4.11.bb at ~/yocto/rt_linux/sources/yocto/recipes-core/ecmaster.
Add the following content into this file, this will become the build recipe which includes
Header with a description, license information and dependencies
List of source application files
Installation instructions and package name (ecmaster)
SUMMARY = "EtherCAT Master"
LICENSE = "EC-Master_Standard-LicenseAgreement-V2.5.1"
LIC_FILES_CHKSUM = "file://${THISDIR}/../../../yocto_src/licenses/EC-Master_Standard-LicenseAgreement-V2.5.1;md5=7ba5f2117d3492ee30f5d68213d3324f"
DEPENDS = "librtos "
SRC_URI = "file://EcMasterDemo \
  file://libemllCCAT.so \
  file://libemllI8254x.so \
  file://libemllLAN743x.so \
  file://libemllRTL8169.so \
  file://libemllSockRaw.so \
  "

S = "${WORKDIR}„

do_install() {
  install -d ${D}/usr/bin/
  install -m 0755 ${WORKDIR}/EcMasterDemo ${D}/usr/bin/
  install -m 0755 ${WORKDIR}/libemllCCAT.so ${D}/usr/bin/
  install -m 0755 ${WORKDIR}/libemllI8254x.so ${D}/usr/bin/
  install -m 0755 ${WORKDIR}/libemllLAN743x.so ${D}/usr/bin/
  install -m 0755 ${WORKDIR}/libemllRTL8169.so ${D}/usr/bin/
  install -m 0755 ${WORKDIR}/libemllSockRaw.so ${D}/usr/bin/
}

FILES:${PN} += " \
/usr/bin/EcMasterDemo \
/usr/bin/libemllCCAT.so \
/usr/bin/libemllI8254x.so \
/usr/bin/libemllLAN743x.so \
/usr/bin/libemllRTL8169.so \
/usr/bin/libemllSockRaw.so"

# skip QA check because we deliver .so files inside non dev packet
INSANE_SKIP:${PN} += "ldflags"

PROVIDES += "ecmaster"
Adjust the …/rtlinux-image-initramfs.bb Bitbake file.
add the ecmaster Package:
PACKAGE_INSTALL += " \
                   kernel-modules \
                   packagegroup-core-ssh-openssh \
                   openssh-sftp-server
                   gdbserver
                   glibc-utils
                   libstdc++ \
                   coreutils gdb tzdata tzdata-europe \
                   ecmaster \
                   "
Finally rebuild the image:
./build.sh
The file rtlinux.bin will be the newly created RT-Linux binary image.
5.3. Linux kernel real time configuration
RT-Linux is shipped with the kernel, optimized for real time usage. Customers can configure the kernel, if necessary, for their specific needs.
The Linux configuration is stored in the file .config. It can be changed with the make menuconfig command.
Here you can find the most important settings which are required to assure real-time behaviour.
CONFIG_VMF - Enables VMF paravirtualization code. Without this setting RT-Linux will be not able to start. Must be set.
CONFIG_PREEMPT_RT_FULL - Enables real time. Should be set.
CONFIG_HIGH_RES_TIMERS - Enables high resolution timers.
Without these timers, applications will be not able to sleep less than a single OS tick.
Its tick is controlled with the CONFIG_HZ setting.
Power management is controlled by Host and must be disabled in Linux:
CONFIG_PM, CONFIG_POWER_SUPPLY, CONFIG_ACPI, CONFIG_SUSPEND, CONFIG_LOCKUP_DETECTOR.
CPU frequency changes, idle states and overheating control will have bad effects on the real-time behaviour. Thus, the following settings should not be set: CONFIG_CPU_FREQ, CONFIG_CPU_IDLE, CONFIG_X86_MCE.
The following devices are not supported by RT-Linux and should be disabled:
USB devices:
CONFIG_USB_SUPPORTParallel:
CONFIG_PARPORTDisk devices:
CONFIG_CDROM_PKTCDVD,CONFIG_SCSIGraphics devices:
CONFIG_AGP,CONFIG_FBHPET should be controlled by VMF:
CONFIG_HPET
5.4. Security
The default RT-Linux image covers the needs of most customers.
In a typical use case, the Linux part of a RT-Linux based application does not have any connection to the Internet. In case the Linux part needs access to the outside network (and possibly is connected to the Internet also), for example by assigning a PCI network card to Linux, security measures may be required.
Here you will find some recommendations to increase security of the Linux part in such cases:
The Telnet server should be disabled by setting the
notelnetparameter toyes. You can build you own kernel image without the Telnet server.OpenBSD Secure Shell server may be disabled by setting the
nosshparameter toyes. You can build you own kernel image without the SSH server.The default root password should be changed. It is defined at
Source/yocto/conf/layer.conffile.Default certificates for SSH should be changed by changing the files at
Source/yocto/recipes-core/initrdscripts/files/etc/sshfolder.For 64-bit Kernel the
noptiparameter should be removed. You should setcmd_lineparameter toauto
5.5. How to add LTTng to the RtLinux image
To include the different LTTng tools in your system, do the following:
Add the following line to the
sources/yocto/recipes-core/images/rtlinux-image-initramfs.bbfile
PACKAGE_INSTALL += " lttng-tools lttng-modules lttng-ust "
Add the line to the
sources/yocto/recipes-kernel/linux/linux-yocto-rt_5.15.bbfile:
SRC_URI:append = " file://trace.cfg "
Add the line to the
sources/yocto/recipes-kernel/linux/linux-yocto-rt/trace.cfgfile
CONFIG_KPROBES=y
Build the image and copy rtlinux.bin to the host machine.
To test LTTng you can follow “LTTng” chapter from the “Yocto Project Profiling and Tracing Manual”. Simple test could be done with following command in RtLinux guest:
lttng create