4. Configuration Mode
4.1. Overview
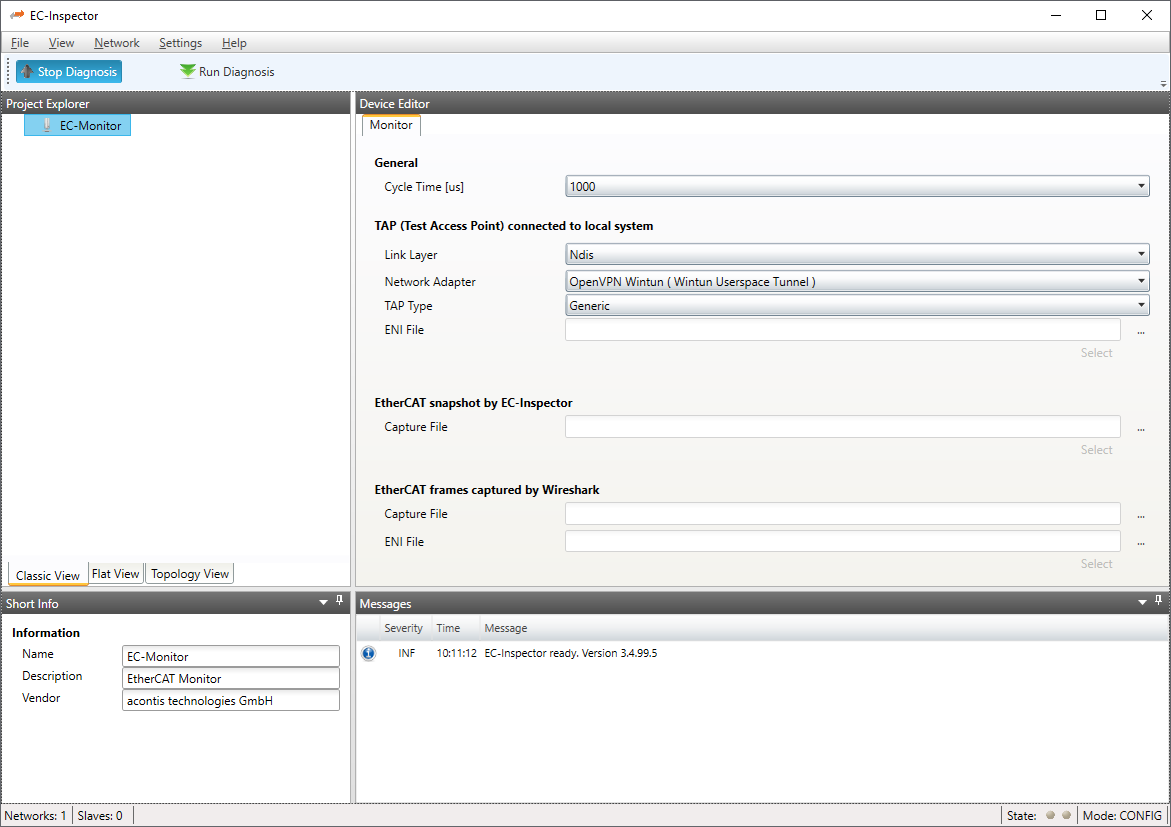
- At startup of EC-Monitor, the user will see this page:
4.2. Monitor Settings
4.2.1. Monitor
- In this tab, the user can configure the cycle time. If he wants to connect to a control system, this can also be configured. After one of these modes is selected, the ENI file will be imported to show the configuration:

- General
- Cycle Time:
Interval in microseconds for the EC-Monitor.
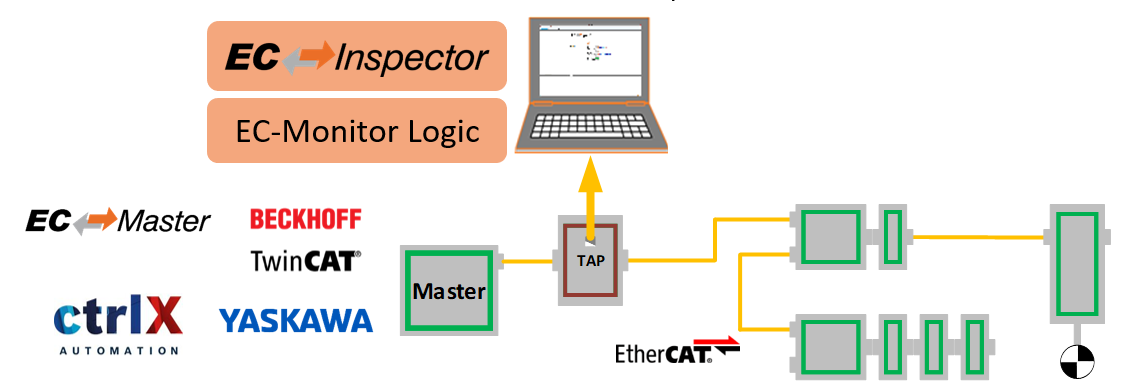
- TAP connected to local system
- LinkLayer:
Select the Link-Layer which should be used.
- Network Adapter:
Network adapter which is connected to TAP or the switch.
- TAP Type:
Select the type of TAP adapter which is used. Generic is for a standard switch. Supported is also the ET2000. More will be supported in the future.
- ENI File:
- Path to the ENI which is used in the network that should be monitored. The ENI file can be exported in EC-Engineer. It is also possible to export an ENI file from TwinCAT.
In the EtherCAT tab in TwinCAT is a button “Export Configuration File…”. The “Export Configuration File…” button opens a “Save as” dialog for saving the XML master configuration file. This file describes the process data and the transfer frames that are sent during the EtherCAT state transitions.
- EtherCAT snapshot by EC-Inspector
- Capture File:
Path to the capture file, which contains one or more snapshots
ecd
For more information about the snapshots and capture files, see Capture File
- EtherCAT frames captured by Wireshark
- Capture File:
Path to the capture file
pcap- ENI File:
Path to the ENI which was used for the captured network.
For more information about the capture files, see Wireshark File
4.2.2. Process Data Image
- In this tab, the user can see all variables of the process data image.
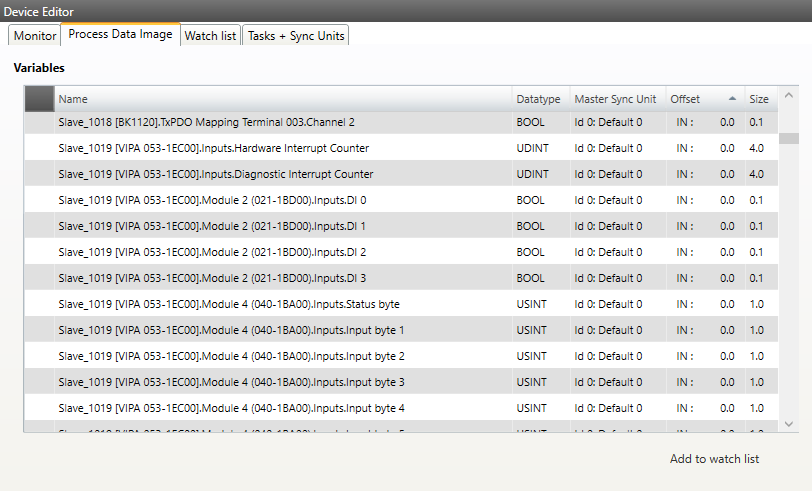
The variables can also be added to the watchlist, to have a better overview in diagnosis mode.
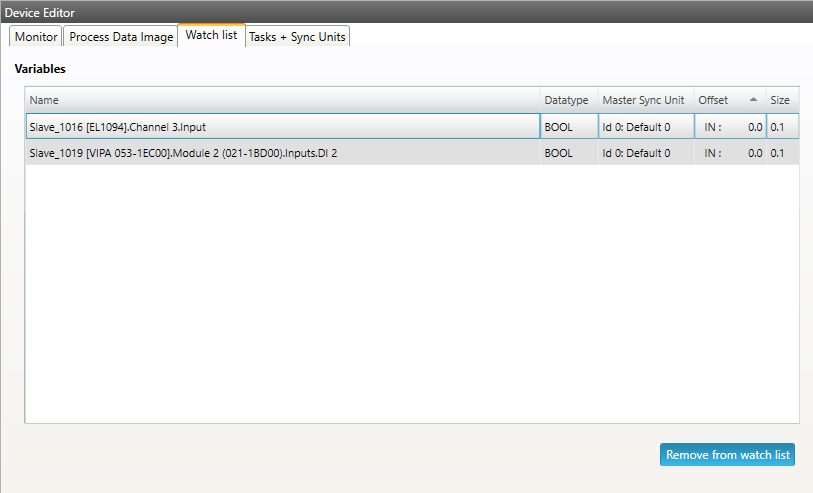
4.2.3. Watchlist Monitor
- In this tab, the user can see the watchlist and remove variables from the watchlist.
4.2.4. Tasks + Sync Units
- In this tab, the user can see the tasks and master sync units of the ENI file.
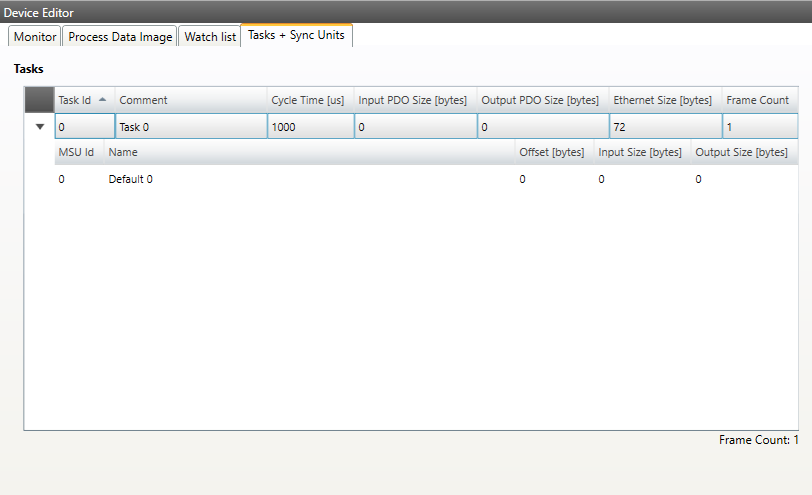
- Tasks:
List of cyclic tasks and master sync units.
4.2.5. Data Acquisition
In this tab, the user can configure our Data Acuisition (DAQ) library. This library can used from EC-Insepector to record process data in realtime.
- After adding a new recorder, the user can select the variables which should be recorded and specify some triggers:
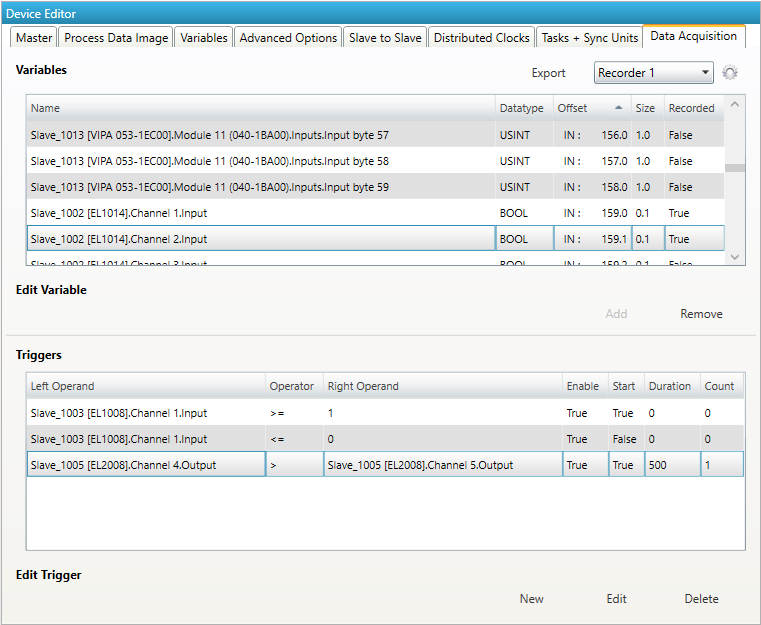
- Variables:
- Add/Remove:
Used for adding or removing the selected variable to the recording.
- Triggers:
- New/Edit/Delete:
Used for changing the trigger list.
- If user wants to edit a recorder, he will see the following dialog:
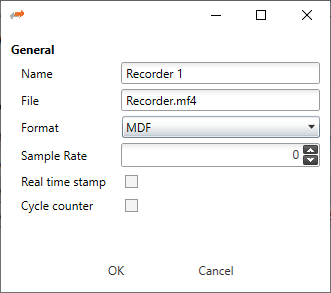
- Name:
Name of the recorder
- File:
Absolute path of the recorder file on the master system
- Format:
- Format of the recorder file, e.g.
MDF(Measurement Data Format)CSV(Comma Separated Values)
- Sample Rate:
Sample rate of the recorded data e.g. every cycle or every second cycle, …
- Real time stamp:
Adds a real time stamp to the recorded data
- Cycle counter:
Adds a cycle counter to the recorded data
- If user wants to edit a trigger, he will see the following dialog:
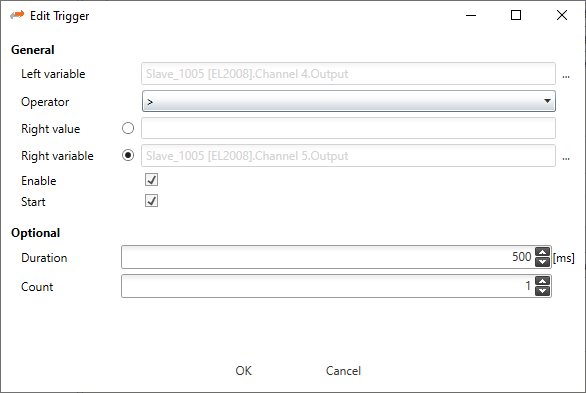
- General
- Left variable:
Name of the left variable
- Operator:
Operator of the trigger (e.g. =, >, >=, <, <=, !=)
- Right value:
Value of the right operand to compare the left variable against a static value e.g. trigger, if variable is greater than 5
- Right variable:
Name of the right variable to compare the left variable against the value of another variable e.g. trigger, if variable 1 is smaller than variable 2
- Enable:
Enabled or disabled trigger (can be enabled from application later)
- Start:
Start or stop trigger
- Optional
- Duration:
Duration in ms (0 = infinite) e.g. trigger should start recording for 500 ms
- Count:
Trigger count (0 = infinite) e.g. trigger should hit only for 5 times
For more information please refer the manual of the EC-Master-Data-Acquisition-Library.
4.2.6. Trigger
- In this tab, the user can create, edit und remove trigger. When a trigger is hit, the monitor will stop and show the actual state. At the moment trigger for process data are supported.
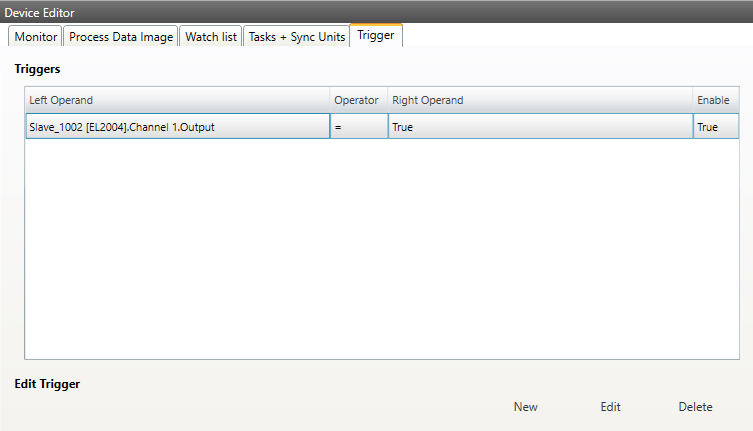
- Trigger:
List of trigger.
- Edit Trigger:
- New: When new is clicked the following dialog pops up:
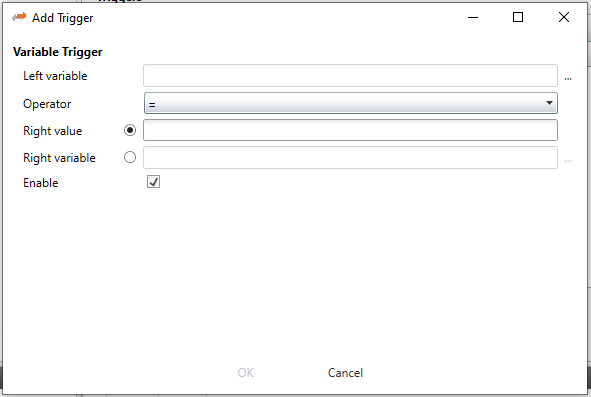
The user can select variable which should be compared and the select if he wants to compare with a value or another variable. With enable the trigger can be enababled and disabled.
Edit: Edit the selected trigger
Remove: Remove the selected trigger from project
- If the EC-Inspector stops because of a trigger it can be restarted with Run. It is also possible to pause the EC-Inspector without a trigger:

4.3. Slave Settings
4.3.1. General
- In this tab, the user can see general slave settings like station address or the name of the slave. He can also see the connected ports.
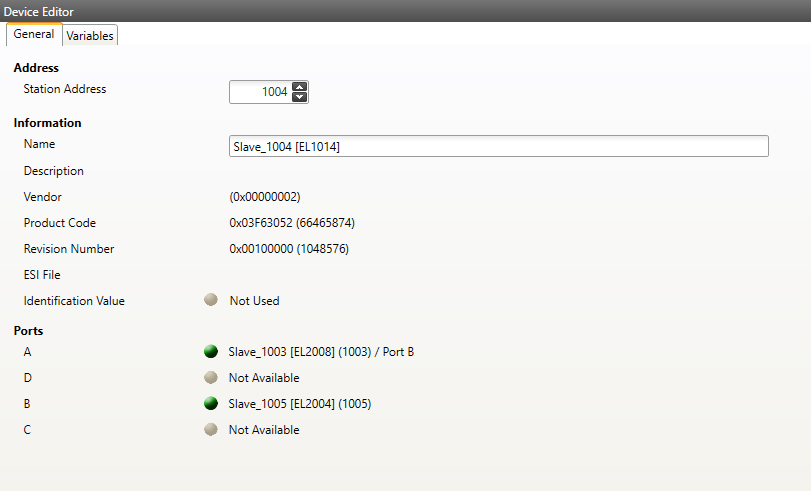
- Address
- Station Address:
Station address of the slave. By default, the first station address is 1001.
- Information
- Name:
Name of the slave. By default the following format is used “Slave_N [TYPE]”
- Vendor:
Name of the vendor the slave
- Product Code:
Product Code of the slave
- Revision Number:
Revision Number of the slave
- Identification Value:
Identification Value of the slave
- Ports
- Connected Devices:
List of connected devices
4.3.2. Variables
- In this tab, the user can see the variables of the slave.
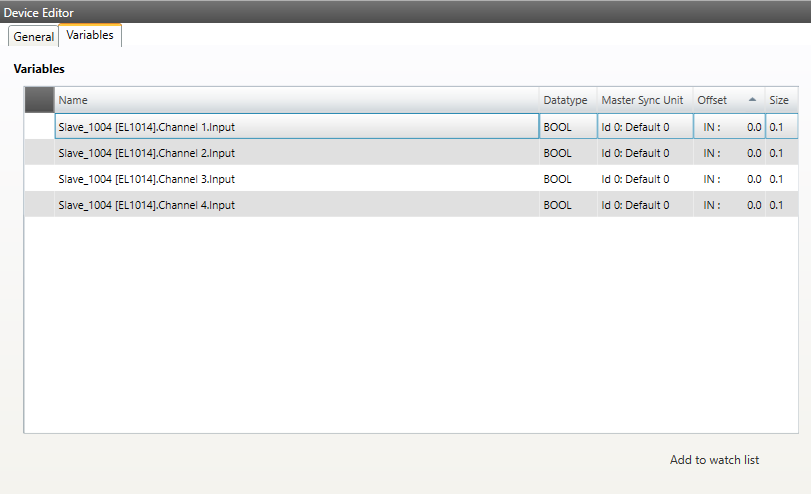
- Lists of Variables
Variables comes from the import of the ENI file.
- Buttons
- Add to watchlist:
Adds the variable into the watchlist