16. Remote Debugging
16.1. Debugging RT-Linux Guest with Visual Studio on Windows
You may use the third party VisualGDB solution for development and debugging of RT-Linux applications using Microsoft Visual Studio. An evaluation license can be obtained here: http://visualgdb.com/download
After installing VisualGDB restart Visual Studio to get the latest VisualGDB package updates.
For the Kernel 5.15 both 32 and 64-bit toolchain can be downloaded here: http://software.acontis.com/LxWin/mingw64.7z
Extract the zip file into C:\
Hint
If you want to extract into another directory, ensure there are no blanks! When creating a new Visual Studio project, ensure that there are no blanks in the project path as this will produce some errors.
16.1.1. Create a new project
Start the Hypervisor Host, configure to run the Linux RTOS and start RT-Linux (this is described in the Quick Start Tutorial).
Set up network bridging and assure you can reach the RT-Linux OS from your Windows development machine. See chapter Bridge virtual and physical network for details. Alternatively you can also use network forwarding, see Network Forwarding from external computer to the RTOS
Start Visual Studio
Create a new VisualGDB project by using the
Linux Project WizardSet up the project as Application and use MSBuild
Set the
Language standardtoC++
Select
Build the project locally with a cross-compiler
In the Cross-toolchain field select
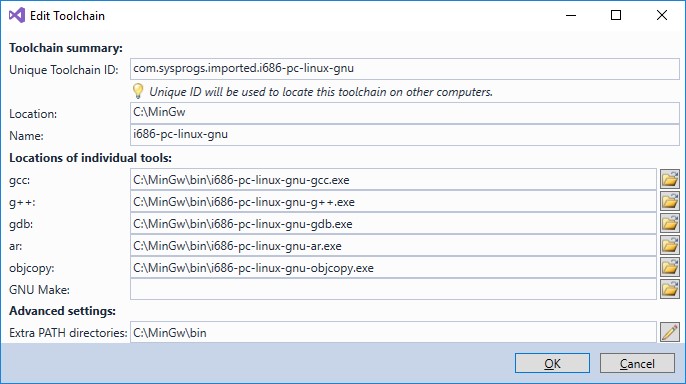
Locate a cross-toolchain by finding its gdb.exeand selectC:\MinGw\bin\i686-pc-linux-gnu-gdb.exeFor the 64 bit (x64) toolchain select
C:\MinGw64\bin\x86_64-pc-linux-gnu-gdb.exeEdit the Toolchain dialog looks like:
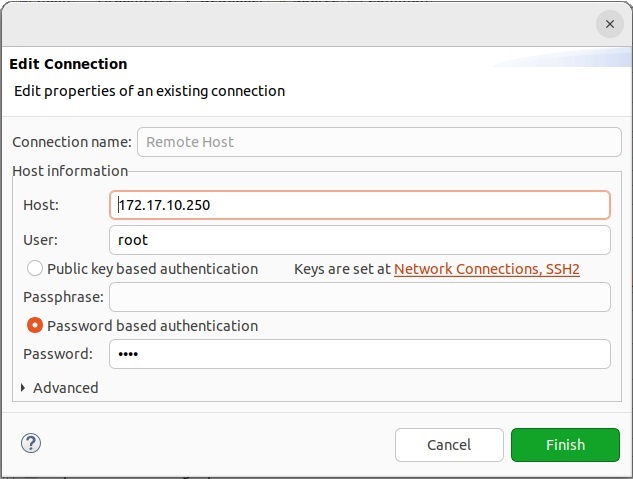
In the
New Linux Project-View, click the drop-down-fieldDeployment computerto create a new SSH connectionAssure RT-Linux is started before you create the SSH connection! As host name use the IP address of the RT-Linux. User name and password are both
root.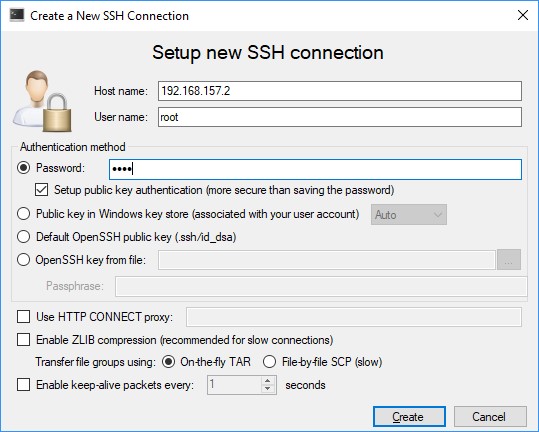
Assure, before finishing the New Linux Project dialog looks like this:
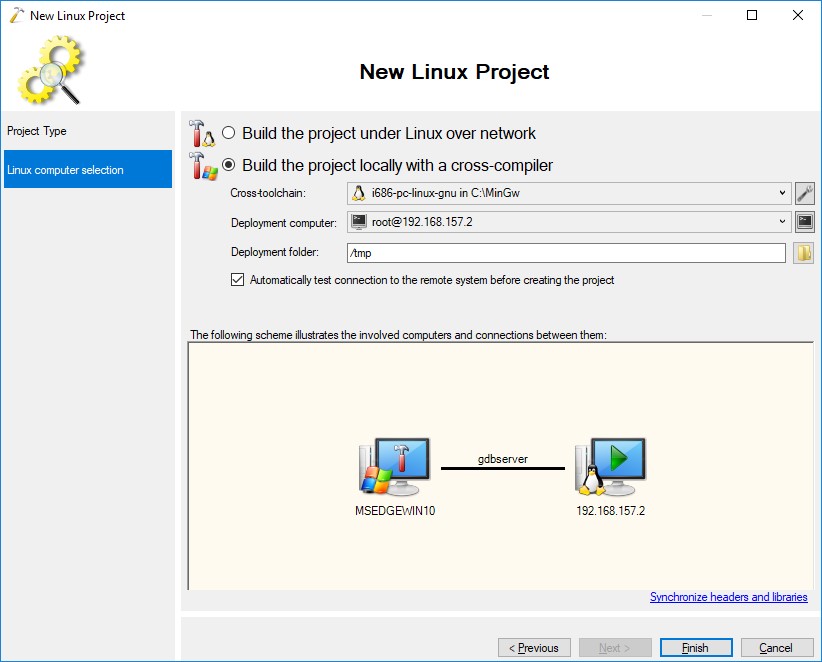
Then press Finish. Accept the
Mismatching environment detectedmessage with the OK Button.Now you can debug the project
16.2. Debugging RT-Linux Guest with Eclipse on Ubuntu
Setup Debug Environment
Start the Hypervisor Host, configure to run the Linux RTOS and start RT-Linux (this is described in the Quick Start Tutorial).
Set up network bridging and assure you can reach the RT-Linux OS from your Windows development machine. See chapter Bridge virtual and physical network for details. Alternatively you can also use network forwarding, see Network Forwarding from external computer to the RTOS
Ensure the connection is working by establishing an SSH connection from your Ubuntu development PC.
Install Eclipse (e.g. Eclipse Installer Package for Linux / select Eclipse IDE for C/C++ Developers)
Create a project and insert your Application Source (e.g. the RT-Linux SDK)
Menu File - New Project - C/C++ Project
Select Project Type (e.g. C++ Managed Build)
Name your project and press ‘Finish’
Extract the SDK (
/hv/guests/files/LinuxTools/rt-linux.tar) from the Hypervisor Host into this project directory located in the eclipse workspaceBuild your examples
Refresh the project in eclipse
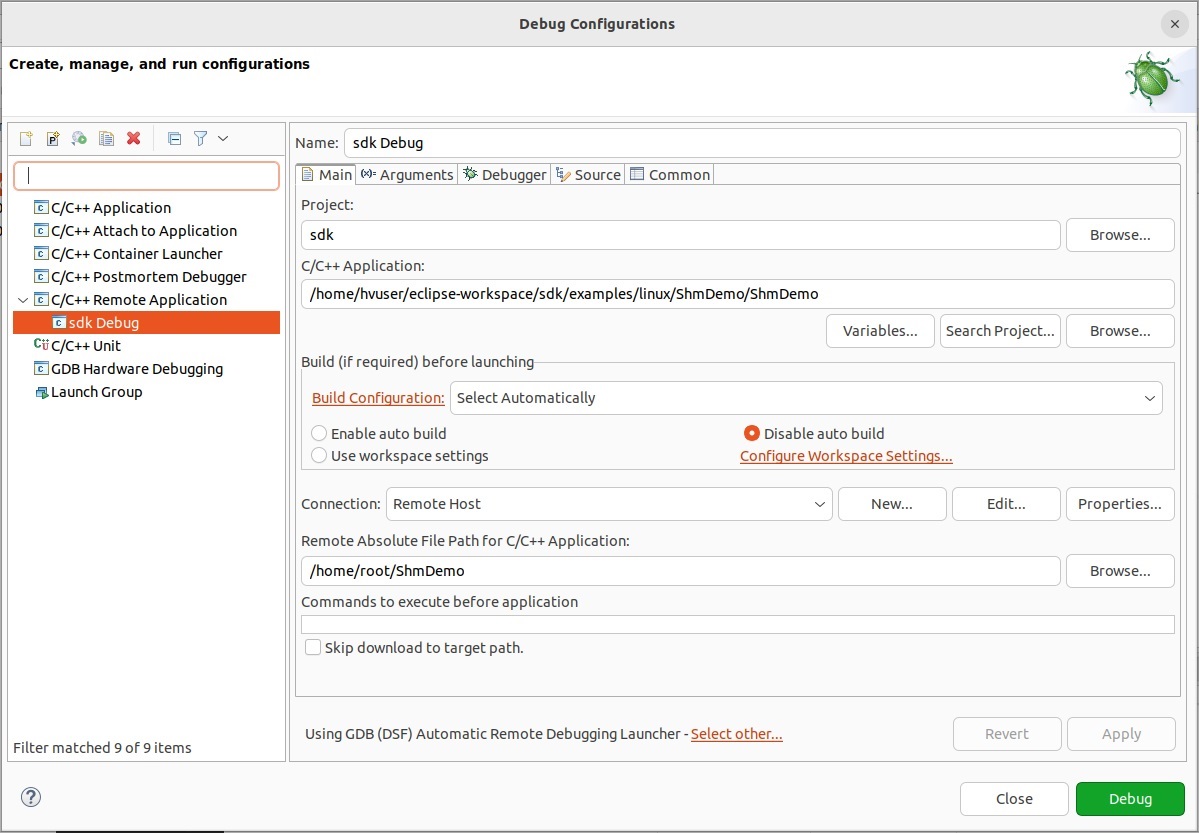
Create a debug Configuration
16.3. Debugging VxWorks Guest using Tornado or Workbench
Start the Hypervisor Host, configure to run the VxWorks RTOS and start VxWorks.
Set up network bridging and assure you can reach the VxWorks OS from your development machine. See chapter Bridge virtual and physical network for details. Alternatively you can also use network forwarding, see Network Forwarding from external computer to the RTOS
Ensure the connection is working by establishing an SSH connection from your development PC.
Install the VxWorks development environment.
16.3.1. VxWorks7 2403
Create a downloadable kernel module and insert your Application Source (e.g. the RT-Linux SDK)
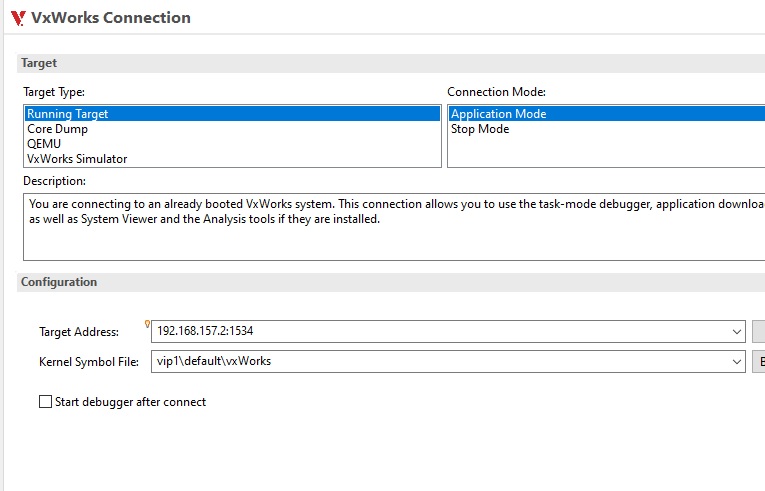
Create a VxWorks connection:
Run/Debug Kernel task:
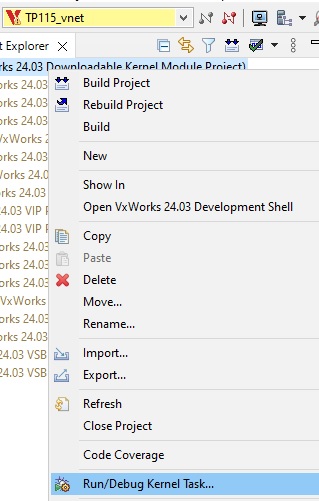
Now you are able to remote Debug your VxWorks application
16.4. On Time RTOS-32
There are separate tutorials which describe how to set up remote debugging for On Time RTOS-32.