8. Licensing
8.1. Overview
For EC-EngineerWeb we have two license models: - Node Locked License - Floating License
8.2. Node Locked License
- If you choose this license model, you need an USB dongle for every single computer. This dongle must be plugged into the computer where you want to use EC-EngineerWeb.

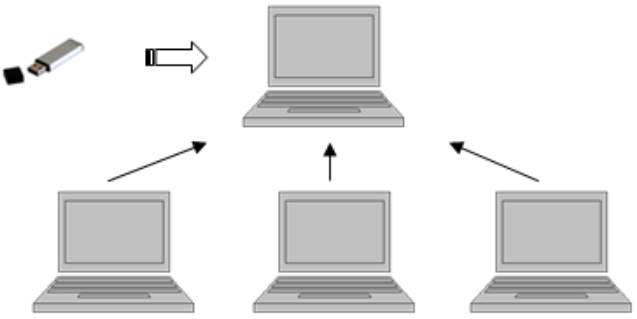
8.3. Floating License
If you choose this license model, you need only one USB dongle with multiple floating licenses.
- This dongle must be plugged into your license server and all client computers will connect to this license server.
Note
This requires that the “WebAdmin” of the “Code Meter” is installed on the system. On 32 bit systems the “WebAdmin” is included into the MergeModule of WIBU, but on 64 bit systems the “WebAdmin” must be installed by downloading and installing the “Code Meter Runtime” from WIBU: https://www.wibu.com/
8.3.1. Configure License Server
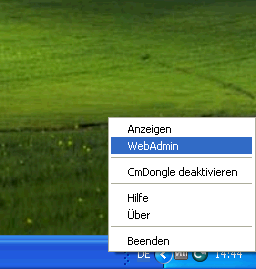
- Install the “Dongle-Version” of EC-EngineerWeb on your license server, plug-in your USB dongle and open the “WebAdmin”: To start the WebAdmin you may need an additional Wibu Merge Module for x64 Systems.
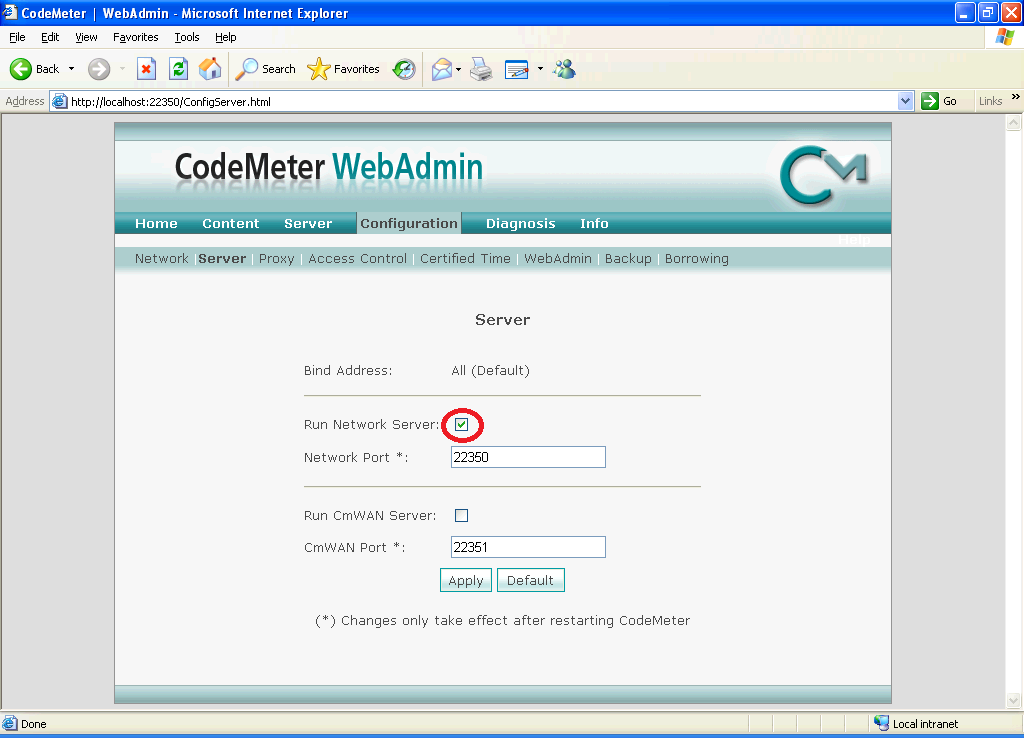
- In the “WebAdmin” navigate to , select the option and press Apply:
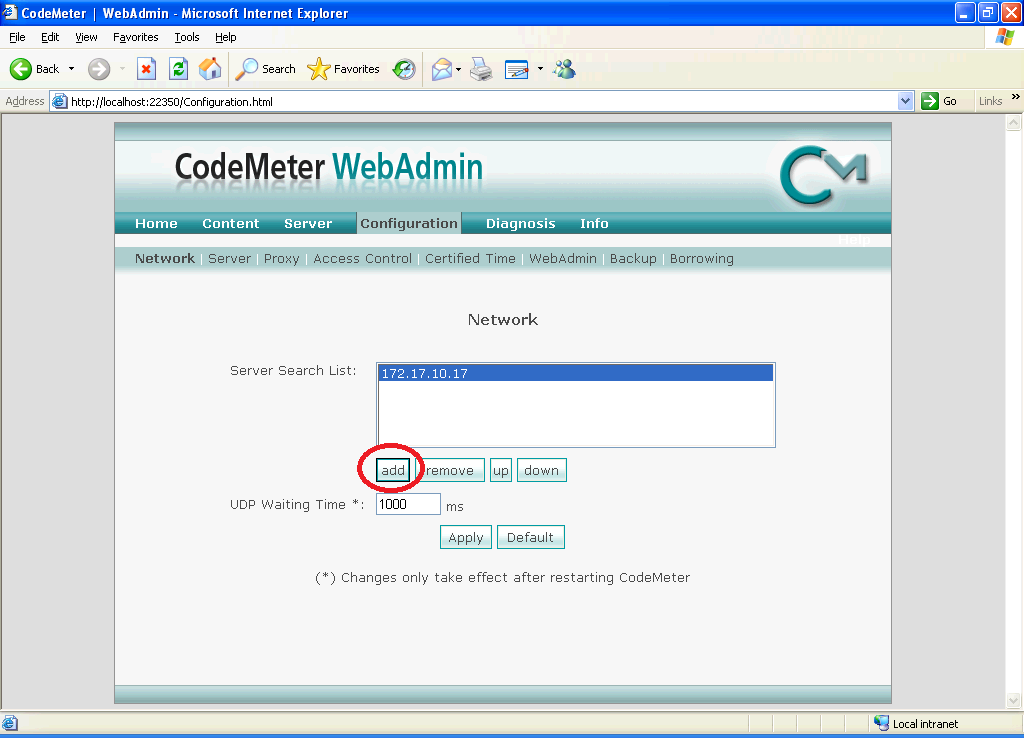
8.3.2. Configure Client Computer
- Install the “Dongle-Version” of EC-EngineerWeb and open the “WebAdmin”:
-
- In the “WebAdmin” navigate to , press add, enter your IP address of your license server and press Apply:
Now, you should be able to start EC-EngineerWeb.
Note
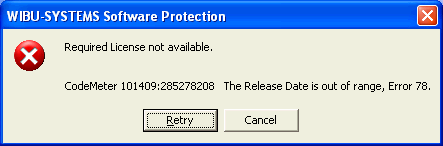
If too many clients are connected you will, you will receive the following error message:
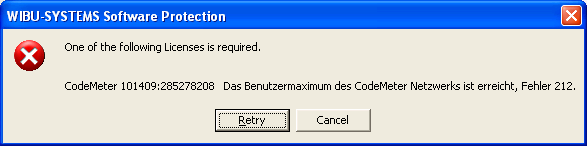
In that case, you should try to close unused EC-EngineerWeb instances or buy more floating licenses.
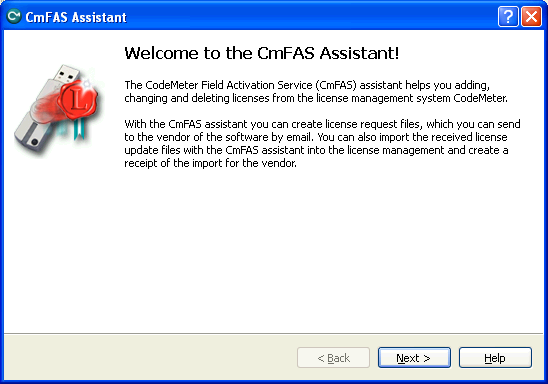
8.4. License Update
8.4.1. Request License Update
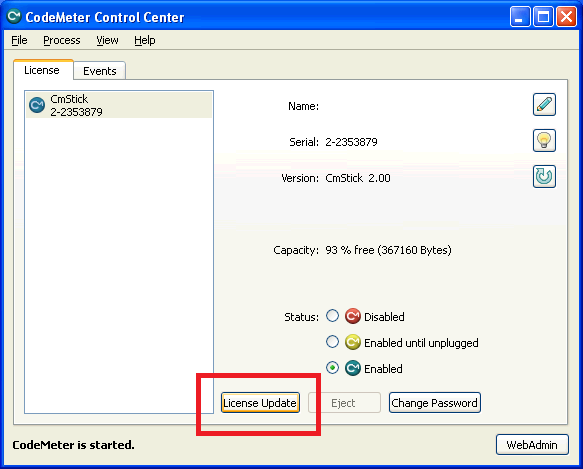
- Step 1: Install the “Dongle-Version” of EC-EngineerWeb and open the “CodeMeter Control Center”:
If the selected license is a virtual dongle, simply drag and drop the WibuCmLIF file onto the CodeMeter Control Center. Otherwise, the dongle should already be visible.
- Step 2: In the “CodeMeter Control Center” open the by clicking on License Update:
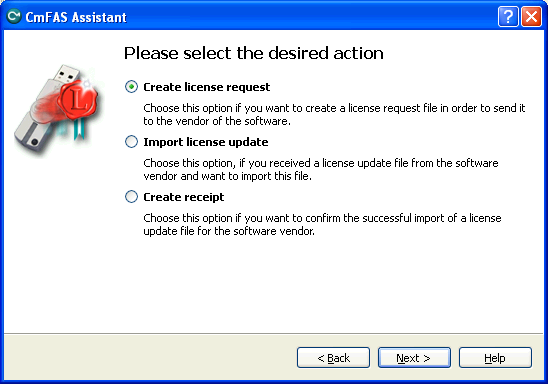
- Step 3: Now, follow the assistant until you can select a file name:
- Step 4: Select Create license request:
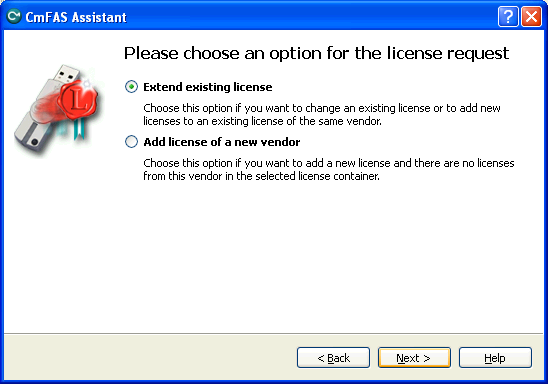
- Step 5: Select Extend existing license:
- Step 6: Keep the selected the vendor:

- Step 7: Select the file name:

- Step 8: Finish the assistant:
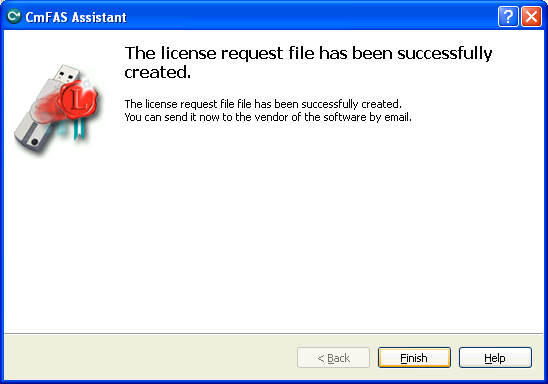
Step 9: Your license request file *.WibuCmRaC has been successfully created. Please send it to sales@acontis.com
8.4.2. Install License Update
After you have been sent your license request file you will receive the license update file *.WibuCmRaU
Step 1: Connect your dongle.
Step 2: Copy the license update file to your desktop.
- Step 3: Double-click on the license update file:
8.5. Dongle Firmware Update
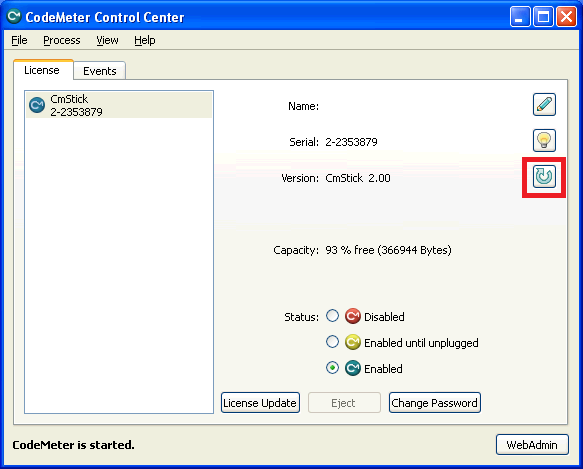
- Step 1: Install the “Dongle-Version” of EC-EngineerWeb and open the “CodeMeter Control Center”:
-
- Step 2: In the “CodeMeter Control Center” click on Update Firmware of selected Cm Dongle:
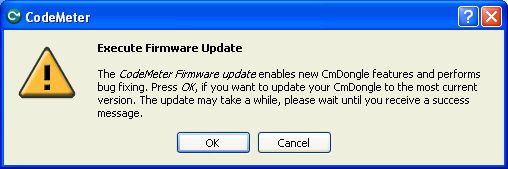
- Step 3: Execute firmware update by pressing OK:
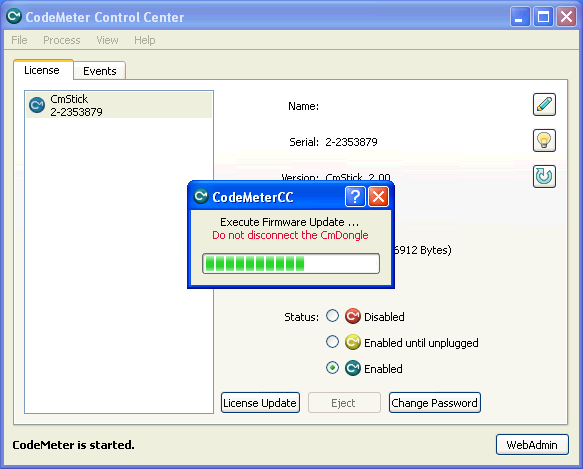
- Step 4: Wait until firmware update was executed:
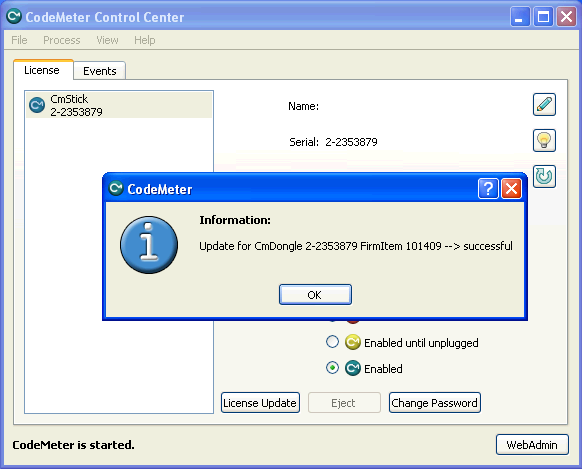
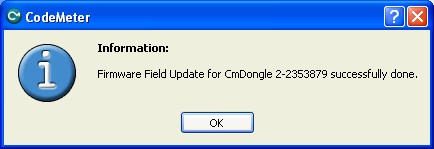
- Step 5: Firmware update was done and dongle can be removed:
8.6. Expiration Date Dongle
- If you chosed a expiration dongle you can find your expiration date in the ‘About Dialog’. If you have an unlimited dongle you will not see a date in the dialog.
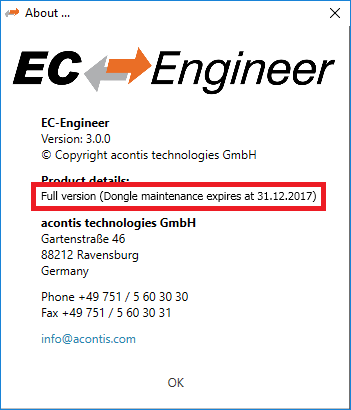
If you see this date you can not use an Engineer which was released after the expiration date, but all older ones are possible.
- If you try to start an Engineer which is newer than the expiration date, you will get the following error: