4.5. Microsoft Windows
4.5.1. EcSimulatorHilDemo - Microsoft Windows
- Install EC-Simulator
Run
setup.exefrom EC-Simulator package, which will guide you through the installation process.
- Determine the network interface
For example the option -ndis 192.168.1.1 0 will be using the network adapter card with the IP address 192.168.1.1.
- Connect EtherCAT Master
The EtherCAT Master can be directly connected to the target system. In rare cases an interposing Ethernet switch helps reducing frame loss on Master startup due to triggered auto-negotiation.
Warning
The local IT infrastructure should not be mixed with EtherCAT modules on the same Ethernet adapter. The EtherCAT Master sends many broadcast packets!
- Run the example application
Execute
<InstallPath>\Bin\Windows\<Arch>\EcSimulatorHilDemo.exe, withx86orx64for<Arch>accordingly. At least a Link Layer option has to be given.EcSimulatorHilDemo -ndis 192.168.1.1 0 -f exi.xml
See also
Running EcSimulatorHilDemo for a detailed description of the demo application.
4.5.2. OS Compiler settings
The following settings are necessary to build the example application for Windows.
- Extra include paths
<InstallPath>\SDK\INC\Windows
<InstallPath>\Examples\Common\Windows
- Extra source paths
<InstallPath>\Examples\Common\Windows
<InstallPath>\Sources\OsLayer\Windows
- Extra library paths to the main EtherCAT components
<InstallPath>\SDK\LIB\Windows
4.5.3. EcatDrv for Auxillary Clock
Due to the non-real-time behavior of Windows, it is not possible to get accurate timing when using the standard timer API. The EcatDrv implements an auxillary clock that is accurate enough to get DCM in sync. The EcatDrv does not guarantee response to the cycle’s deadline.
4.5.3.1. Prerequisites of the EcatDrv
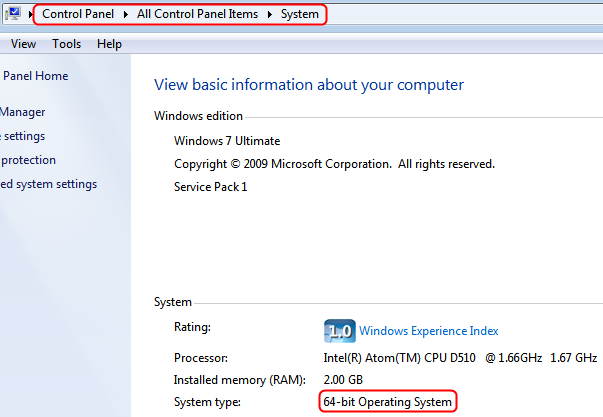
4.5.3.1.1. Microsoft Windows: 32 bit or 64 bit?
On Windows the System Properties dialog contains the information about the PC’s architecture. The System type states if it is a 64-bit Operating System or 32-Bit.
4.5.3.1.2. Disable CPU Power Management Driver
To prevent influences from the Intel-PPM-driver, the driver can be disabled.
The registry file “intelppmOFF.reg” to disable the Intel-PPM-driver can be merged into the registry and is located in the <InstallPath>\Files\Windows-folder of the EC-Simulator installation directory.
Merging “intelppmON.reg” would enable it again.
4.5.3.1.3. Disable Local APIC usage of Windows
To make sure that there is no collision between Windows and the EcatDrv, disable the use of the Local APIC timer for Windows. This can be done by changing the boot configuration with the following command in the Windows console as an administrator:
bcdedit.exe /set {current} useplatformtick yes
4.5.3.1.4. No Local APIC support since Windows 10
Since Windows 10, direct access to the local APIC timer is no longer allowed and can cause an BSOD.
In this case the EcatDrv can use the Windows Kernel Timer as clock source.
To use the Windows Kernel Timer an additional OS layer parameter EC_T_OS_PARMS::PlatformParms::bUseKernelTimerForAuxClk must be set before AuxClkInit():
EC_T_OS_PARMS oOsParms;
OsMemset(&oOsParms, 0, sizeof(EC_T_OS_PARMS));
oOsParms.dwSignature = EC_OS_PARMS_SIGNATURE;
oOsParms.dwSize      = sizeof(EC_T_OS_PARMS);
oOsParms.PlatformParms.bUseKernelTimerForAuxClk = EC_TRUE;
OsInit(&oOsParms);
4.5.3.2. Installing and configuring the EcatDrv on Windows
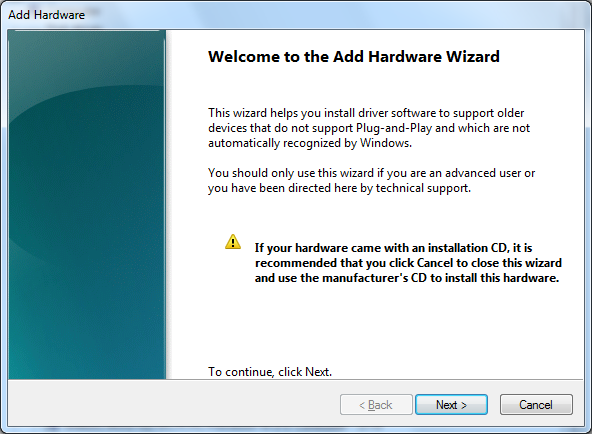
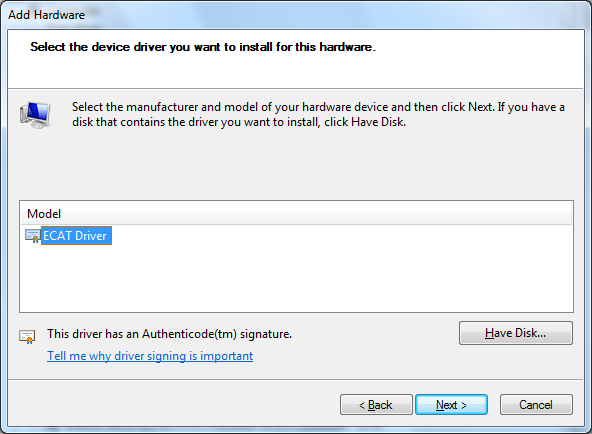
- Start the “Add Hardware Wizard” and click “Next”

The Add Hardware Wizard shows up:
- Select “Install the hardware…” and proceed

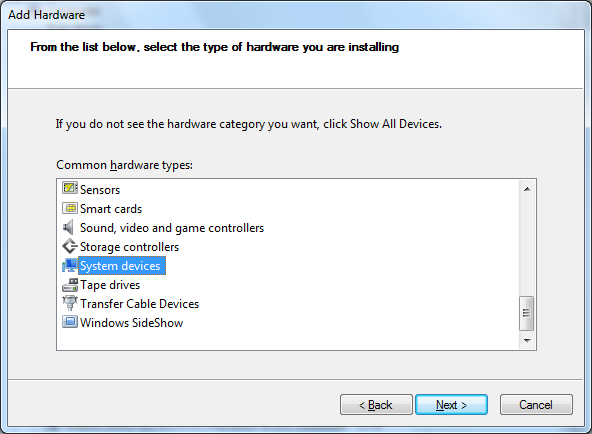
- Select “System devices” and proceed
- Click to “Have Disk…” and proceed
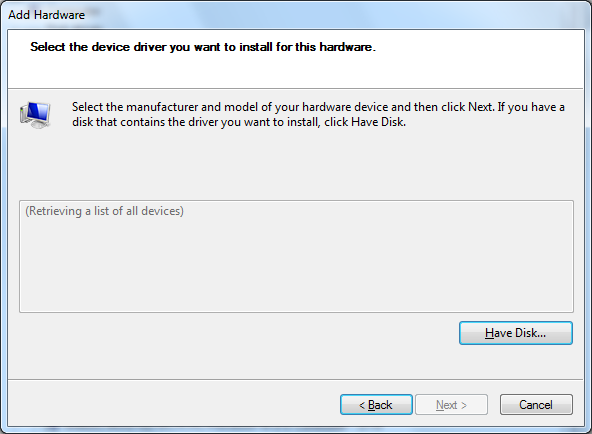
- Enter the directory to the correct driver version (32 bit or 64 bit)
The folder is
<InstallPath>\Bin\Windows\<Arch>, withx86orx64for<Arch>accordingly.Attention
There are two different drivers available: 32 bit and 64 bit. The subfolder x86 contains the 32 bit driver files. The subfolder x64 contains the 64 bit driver files.
Enter the correct directory at the input box:
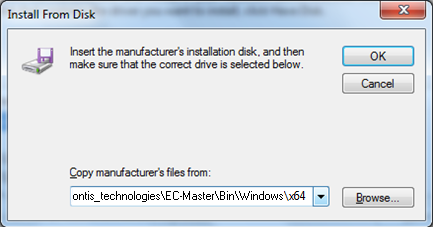
Press OK to proceed.
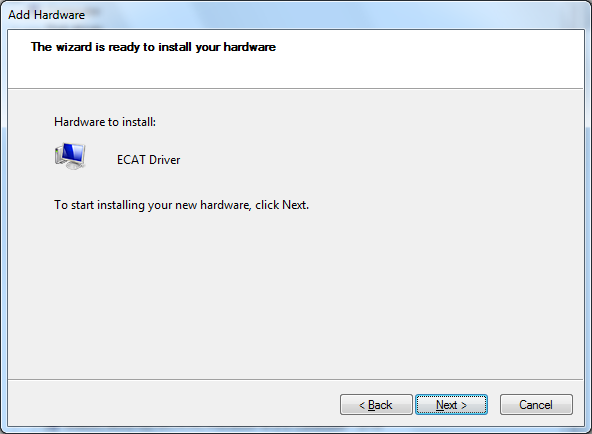
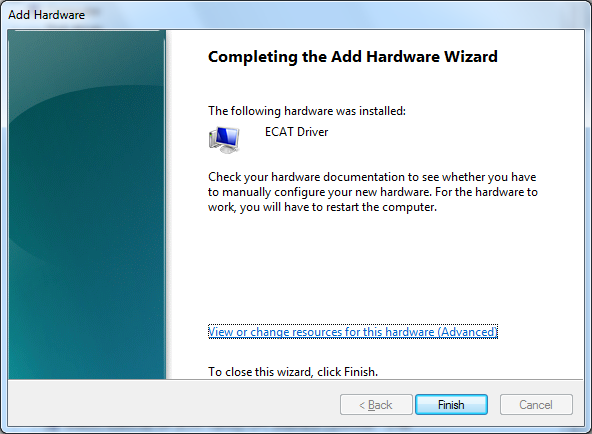
- Choose the EcatDrv and click “Next” and confirm the installation
- Continue on any warning about unsigned driver
- Configure the driver for local APIC usage
Attention
This is not required for Windows 10 !
Open the Device Manager and open the properties of the EcatDrv
Uncheck “Use automatic settings”
Change “Current Configuration” to “Basic configuration 0001”
Double-click the “IRQ”-label and adjust the Interrupt Request Value until “No conflicts” is shown.
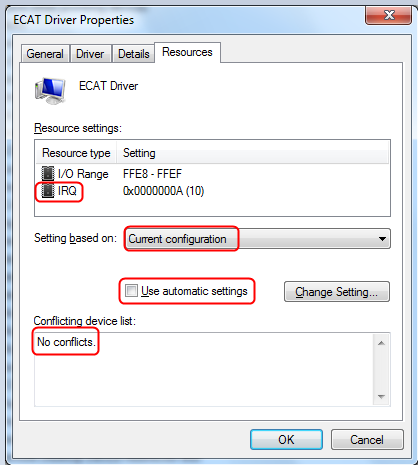
- Press “OK” to close and apply the settings
Confirm the manual settings
Restart the PC
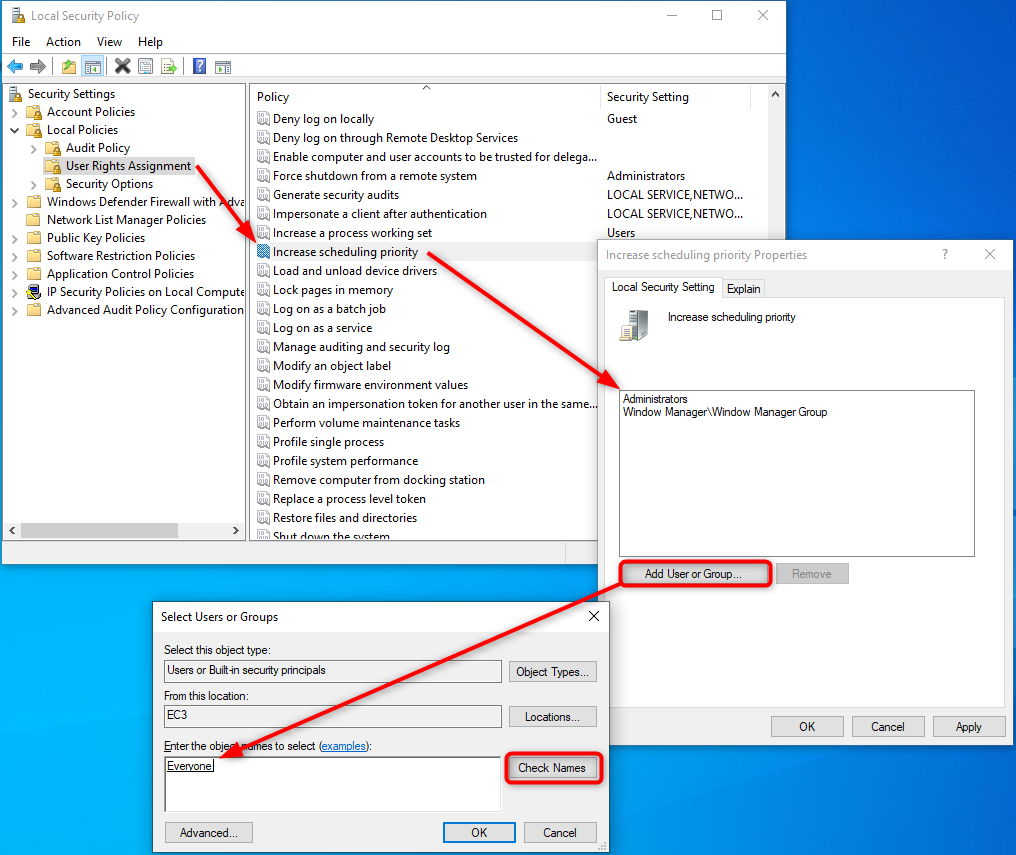
4.5.3.3. Enable Realtime Priority Class
In order to comply with the timing as best as possible, it is necessary that the application / EcSimulatorHilDemo runs with realtime priority.
By default, an application on Windows can not be run with real-time priority. To allow this the Increase scheduling priority user rights policy setting must be set.
Also, the application must be run as an administrator.
Increase scheduling priority setting
4.5.4. EcatDrv for Optimized Link Layer
As alternative to the NDIS based or Pcap based Link Layer, an optional Real-time Link Layer on Windows can be installed. The Link Layer replaces the original Windows driver and also requires an extra license.
To use the optimized Link Layers under Windows, it is necessary to install the EcatDrv driver included in the optimized Link Layer delivery:
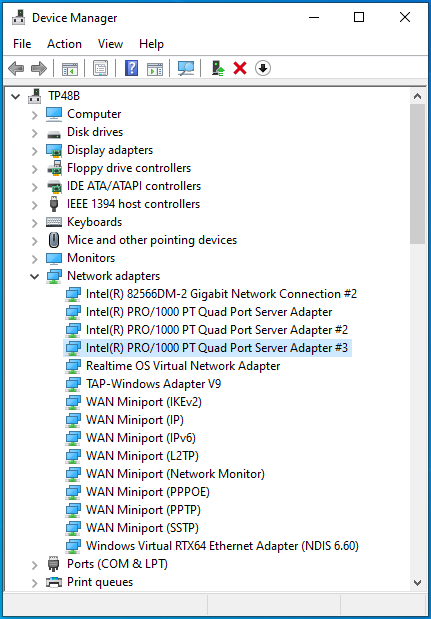
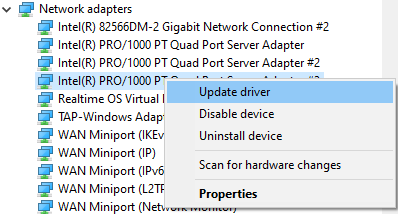
- Start the “Device Manager”

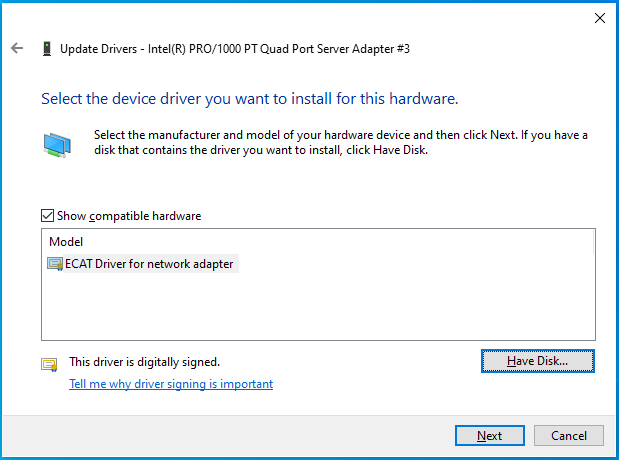
- Assign EcatDrv to the network adapter
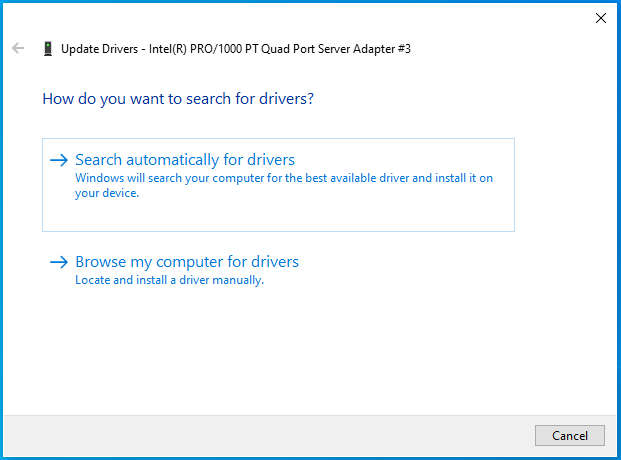
Click on “Browse my computer for driver”
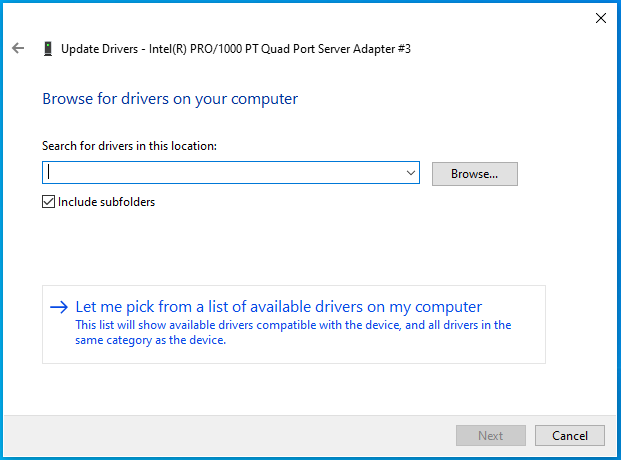
Click on “Let me pick…”
Click on “Have Disk…”
Enter the directory of EcatDrv
The folder is
<InstallPath>\Bin\Windows\<Arch>, withx86orx64for<Arch>accordingly.Attention
Two different versions are available: 32 bit (subfolder x86) and 64 bit (subfolder x64).
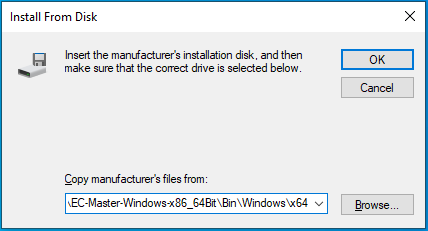
Enter the correct directory at the input box and press OK to proceed.
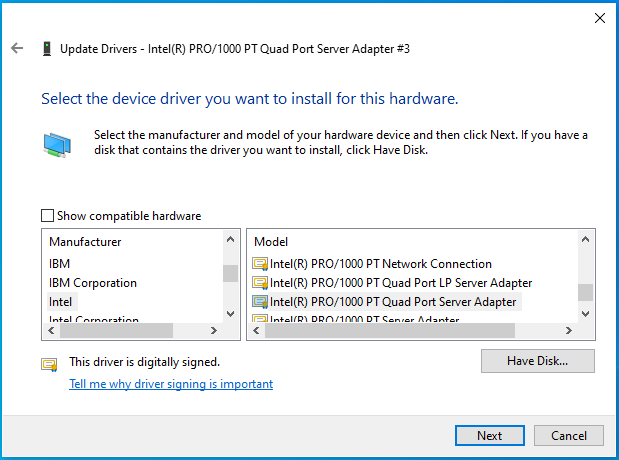
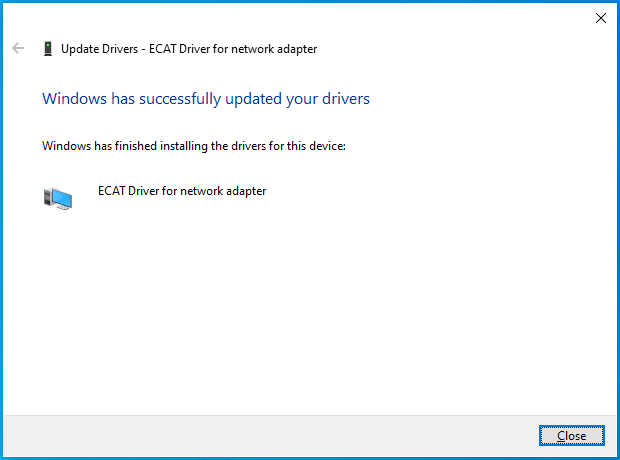
- Choose the EcatDrv and click “Next” and confirm the installation
Optionally modify search location for Optimized Link Layers
Search locations for Optimized Link Layers can be adjusted using the PATH environment variable.