Run setup.exe from EC-Master package, which will guide you through the installation process.
Determine the network interface
For example the option -ndis 192.168.1.1 1 will be using the network adapter card with the IP address 192.168.1.1.
Connect EtherCAT® modules
Any EtherCAT® module can be directly connected to the target system. EtherCAT® requires a 100 Mbit/s connection. If the Ethernet adapter card does not support this speed, an Ethernet switch must be used.
Warning
The local IT infrastructure should not be mixed with EtherCAT® modules on the same Ethernet adapter. The EC-Master sends many broadcast packets!
Run the example application
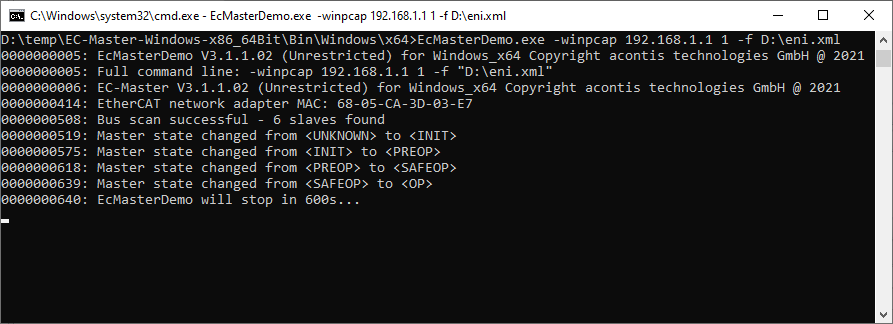
Execute EcMasterDemo.exe from <InstallPath>/Bin/Windows/<Arch>/. At least an Ethernet Driver option has to be given.
4.15.2. EcMasterDemoDotNet (.NET) - Microsoft Windows
Install and run
Install EC-Master
Run setup.exe from EC-Master package, which will guide you through the installation process.
Determine the network interface
For example the option –link ndis 192.168.1.1 1 will be using the network adapter card with the IP address 192.168.1.1.
Connect EtherCAT® modules
Any EtherCAT® module can be directly connected to the target system. EtherCAT® requires a 100 Mbit/s connection. If the Ethernet adapter card does not support this speed, an Ethernet switch must be used.
Warning
The local IT infrastructure should not be mixed with EtherCAT® modules on the same Ethernet adapter. The EC-Master sends many broadcast packets!
Run the example application
Execute <InstallPath>/Bin/Windows/<Arch>/EcMasterDemoDotNet.exe. At least an Ethernet Driver option has to be given.
C:\> EcMasterDemoDotNet -mode 1 -file eni.xml -link "ndis 192.168.1.1 1" -sp 6000 (-help will show usage)
Compile and debug
Copy *.dlls from <InstallPath>/Bin/Windows/<Arch> to <InstallPath>/Bin/Windows/<Arch>/Debug and <InstallPath>/Bin/Windows/<Arch>/Release.
Hint
By copying the DLLs, they can be loaded on startup and original files are not overwritten and are retained.
Open <InstallPath>/Workspace/WindowsVS2015/EcMasterDemoDotNet/EcMasterDemoDotNet.csproj in VS2015 or higher
Specify command line arguments for the project as shown above
(Adapt code,) compile, run, debug as usual
4.15.3. EcMasterDemoGuiDotNet (.NET) - Microsoft Windows
Prerequisites
To run the EcMasterDemoGuiDotNet.exe, the libraries EcMaster.dll, EcMasterRasServer.dll, EcWrapperDotNet.dll, EcWrapper.dll and emllNdis.dll from Bin/Windows/x64 are needed in Bin/Windows/x64/Release, Bin/Windows/x64/Debug
Visual Studio C#-project
The C#-project for VS2015 or higher is located at Workspace/WindowsVS2015/EcMasterDemoGuiDotNet/EcMasterDemoGuiDotNet.csproj
If the reference EcWrapperDotNet is missing, it must be re-added from Bin/Windows/x64/EcWrapperDotNet.dll
EcMasterDemoGuiDotNet is now prepared for Run/Debug
4.15.4. OS Compiler settings
Besides the general settings from Compiling the EcMasterDemo the following settings are necessary to build the example application for Windows.
Extra library paths to the main EtherCAT® components
<InstallPath>\SDK\LIB\Windows
4.15.5. RtaccDevice for Real-time Ethernet Driver
As alternative to the NDIS based or Pcap based Ethernet Driver, an optional Real-time Ethernet Driver on Windows can be installed. The Real-time Ethernet Driver replaces the original Windows driver and also requires an extra license.
To use the Real-time Ethernet Driver under Windows, it is necessary to install the RtaccDevice driver included in the Real-time Ethernet Driver delivery:
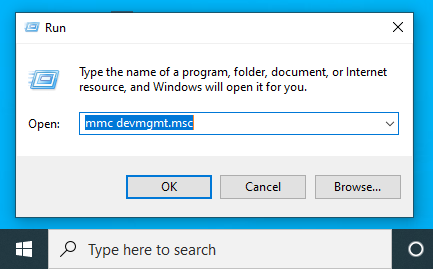
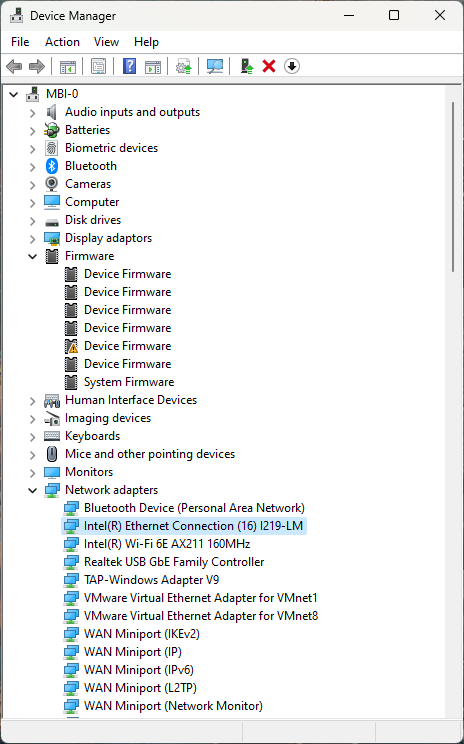
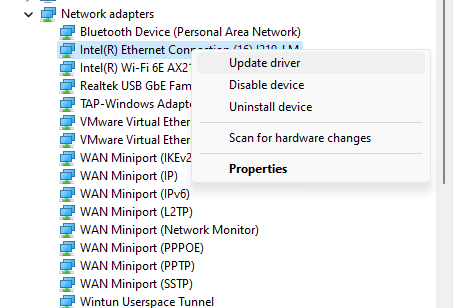
Start the “Device Manager”
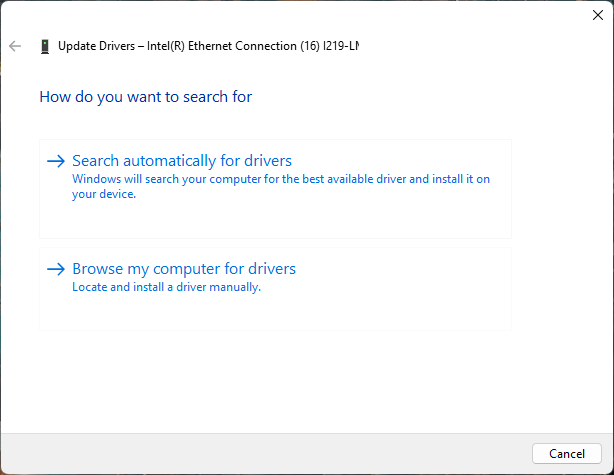
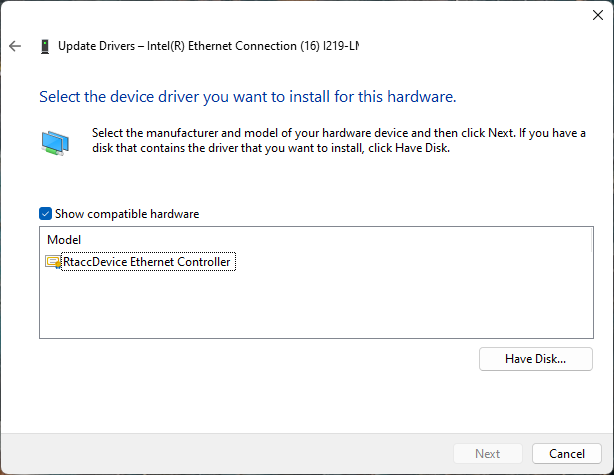
Assign RtaccDevice to the network adapter
Click on “Browse my computer for drivers”
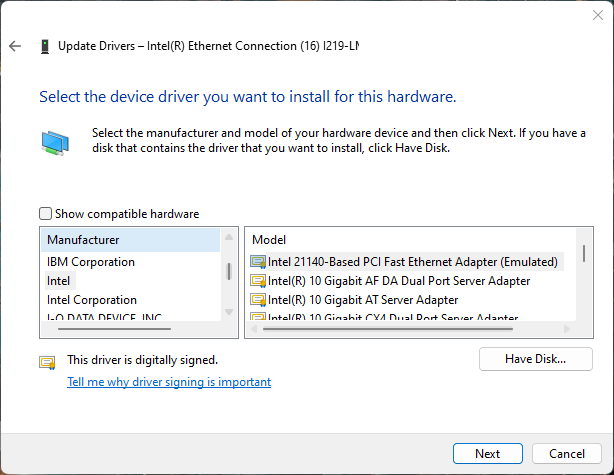
Click on “Let me pick…”
Click on “Have Disk…”
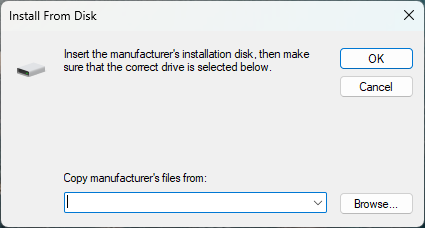
Enter the directory of RtaccDevice Driver
The default folder if not changed is <InstallPath>\Bin\Windows\x64
Enter the correct directory at the input box and press OK to proceed.
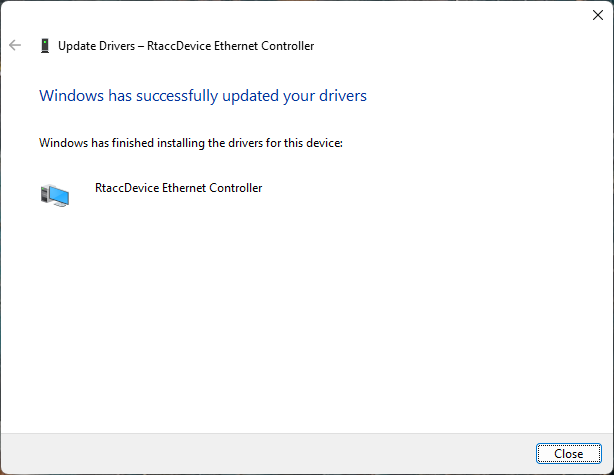
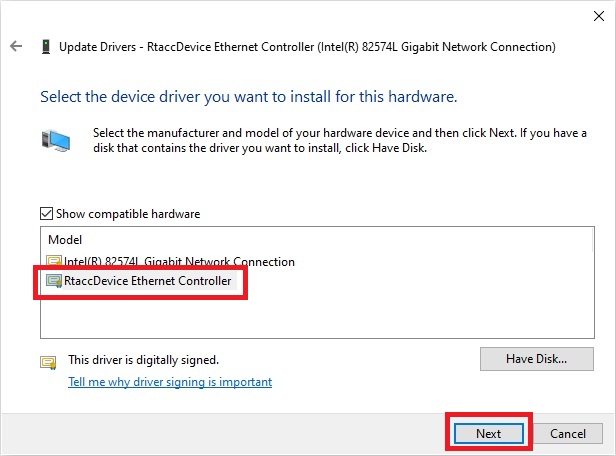
Choose the RtaccDevice Driver and click “Next” and confirm the installation
Optionally modify the search location of the Real-time Ethernet Driver
Search locations for Real-time Ethernet Driver can be adjusted using the PATH environment variable.
The RtaccDevice must be assigned to the network adapter for Real-time Ethernet Driver usage on Windows. In this case it is exclusively bound for EtherCAT® usage.
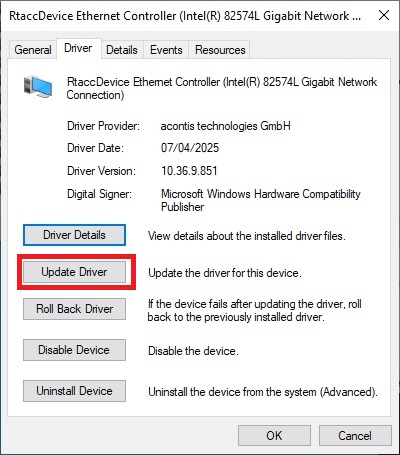
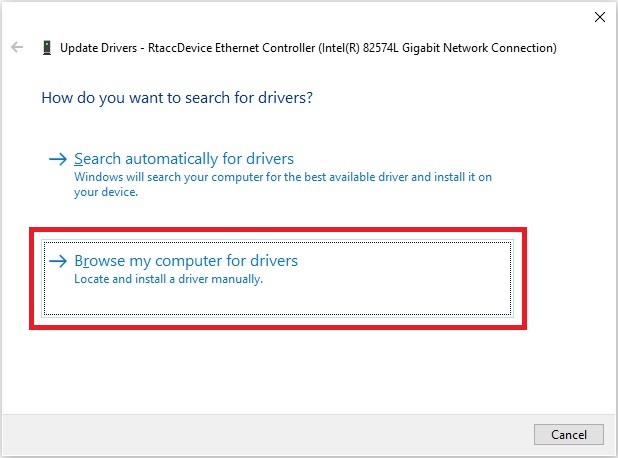
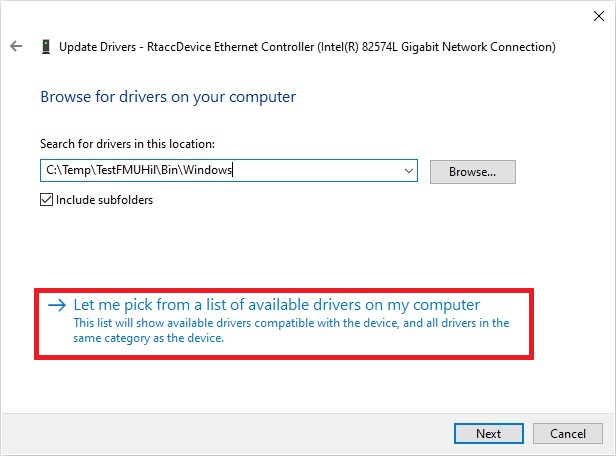
The assignment can be reverted using the following steps:
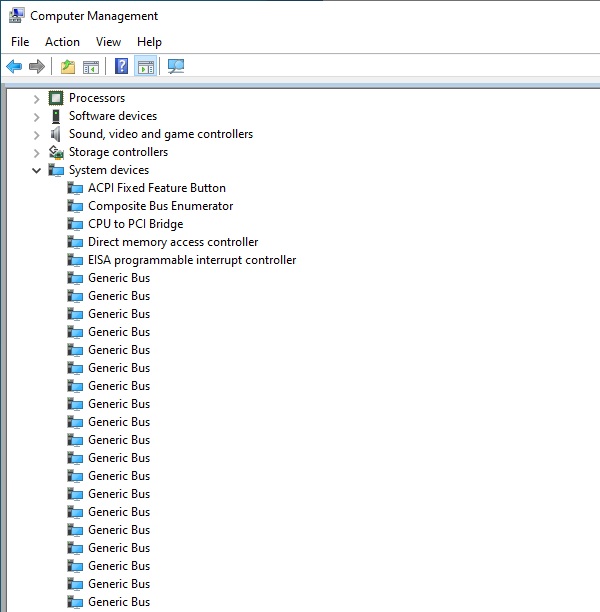
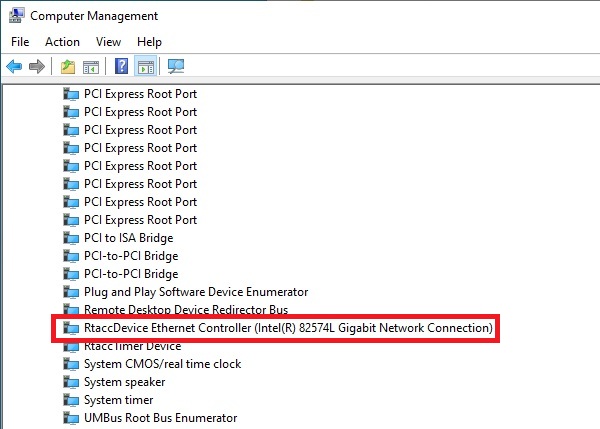
Open the Windows device manager (Computer Management), then go to System devices. The RtaccDevice should be listed there:
Right click on the RtaccDevice Ethernet Controller, then click on Properties:
Switch to the tab “Driver”, then click the button “Update driver”:
Click on “Browse my computer for drivers”:
Click on “Let me pick from a list of available drivers on my computer”: